Motor y Cuerda
Polyphonic electro-acoustic instrument that explores all the hidden voices of an individual string
Tags: Music, Design, Hardware, Fabrication
About the project
Motor Y Cuerda (Spanish) - "Motor and String". Performance based on a polyphonic hand-built electro-acoustic instrument.
There is a worldwide movement that seeks to create new and interesting interfaces for musical expression called NIME (New Interfaces for Musical Expression). This movement is pursued by different kinds of people: researchers, musicians, designers and engineers.
The magnificent world of music was revealed to me as a kid through the piano. By learning the works of the greatest composers of all time, both classical and contemporary, I've fallen in love with the abstraction of sound waves and the wide range of feelings they can make us feel. Motor Y Cuerda was all about the relationship between human and machine, about computer-less music and about the emotional and physical investment we need to put into making things that are personal in this fast-paced and sometimes facile world.
I have always wanted to design and build my own music instrument. Before starting this project, I had experimented with different mediums for creating electronic and digital music. R-Synth is a web-based synthesizer that randomizes 15 parameters with the click of a button, Orientron is a electronic instrument that converts wrist movements into music and Fortran Sampler is an explorative tangible music sampler that works with acrylic punch cards. These are fun projects that I'm grateful to have worked on, but for Motor y Cuerda I wanted to explore deeper, and build something acoustic.
Acoustic instruments, as opposed to electronic or digital instruments, depend on the actual material of the instrument and the dynamic they are played with. This makes the timbre, or the voice of the instrument, depend on physical phenomenons, while electronic music depends on an algorithm, preset, or programmable signal. There is less control and less predictability with acoustic instruments – this made the project very challenging and fun.
Creative process
I started the project by learning as much as possible in materials, acoustics, air dynamics and construction techniques. It became clear very early on that I lacked crucial knowledge, so I looked for instruments that were innovative during the time of their inception, specifically for those that didn't use computers for the generation of a tone and landed on the magical world of electro-acoustic instruments.
These instruments use technology and engineering principles to capture and amplify the natural voice of physical, acoustic objects – think of an electric guitar and how it picks up the natural vibration of a physical string. A lot of work has been done by extremely talented and bright individuals, specifically during the previous century. Some of these creations were commercial successes, and some of them were a stepping stone for others developments. I was extremely inspired by many if not most of the instruments created between 1900-1970, but some notable mentions are the Hammond Organ, Mellotron and Rhodes Piano. I recommend visiting this site and learning about the magical devices people were building without the use of computers. I was also introduced to the work of Andy Cavatorta, an American "sculptor that uses robotics and sound" and had the pleasure of meeting him during this process.
Building techniques
Wood is the most used material for acoustic instruments due to its amazing sound conduction properties. Looking at the tools and equipment I had at my disposal, I was tempted to design and create this instrument using plywood and a CNC router. During my research process, I visited Paul Nieto, founder and owner of Guitartech – a guitar manufacturing shop and store on 14th Street in Manhattan. He taught me about the intricacies of guitar manufacturing, specifically shape and materials, and I learned from him that plywood is a bad choice for resonant bodies. Plywood is formed of various layers of wood glued together. Turns out, that glue stops vibrations and prohibits lower sounds to be heard. That meant that vibrating parts had to be built with natural tone-woods.
Nevertheless, I decided to build a first prototype with what I had. I was heavily inspired by late 1800's and early 1900's inventors such as Thomas Edison and Nikola Tesla. I wanted to capture the aesthetic of the time, and attempt to create an instrument that might've been created during those years. Brutalism, the architectural movement characteristic for blocky design and exposed structure was also a big part of my design inspiration.
First instrument
The first thing that had to be resolved was how the sound was going to be produced. I looked to capture a natural but diverse range of sound, and form a musical system around it, so some degree of melody, harmony and percussion needed to exist. Many ideas came to mind: boiling teapots, glass shattering and air chambers (similar to an air-based instrument). In the end, I landed on traditional guitar, cello and violin strings.
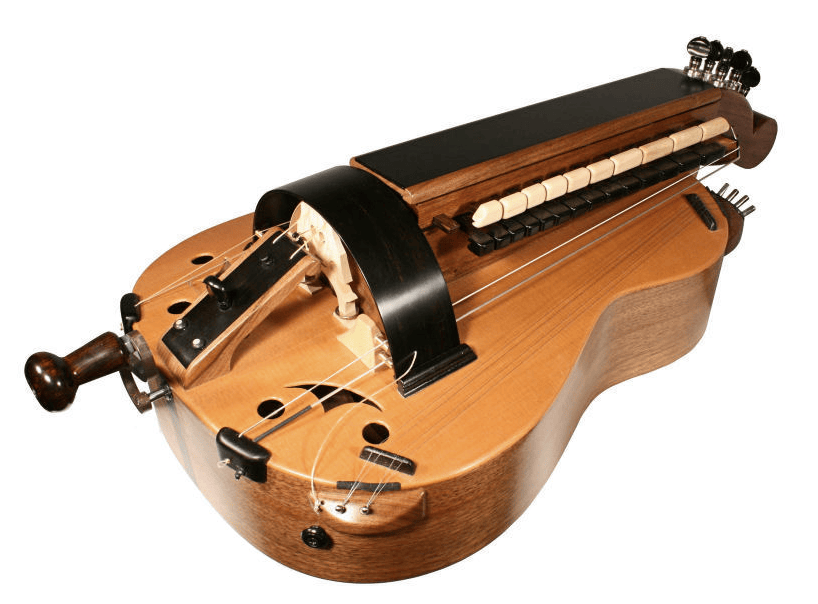
I found the Hurdy Gurdy by looking at instruments that were created centuries ago and instantly felt inspired to build upon it. The spinning wheel made me wonder how could it be augmented with today's technology. I spent some time experimenting with violin strings and wooden wheels that I made using a CNC and hole-saw attached to DC motors.
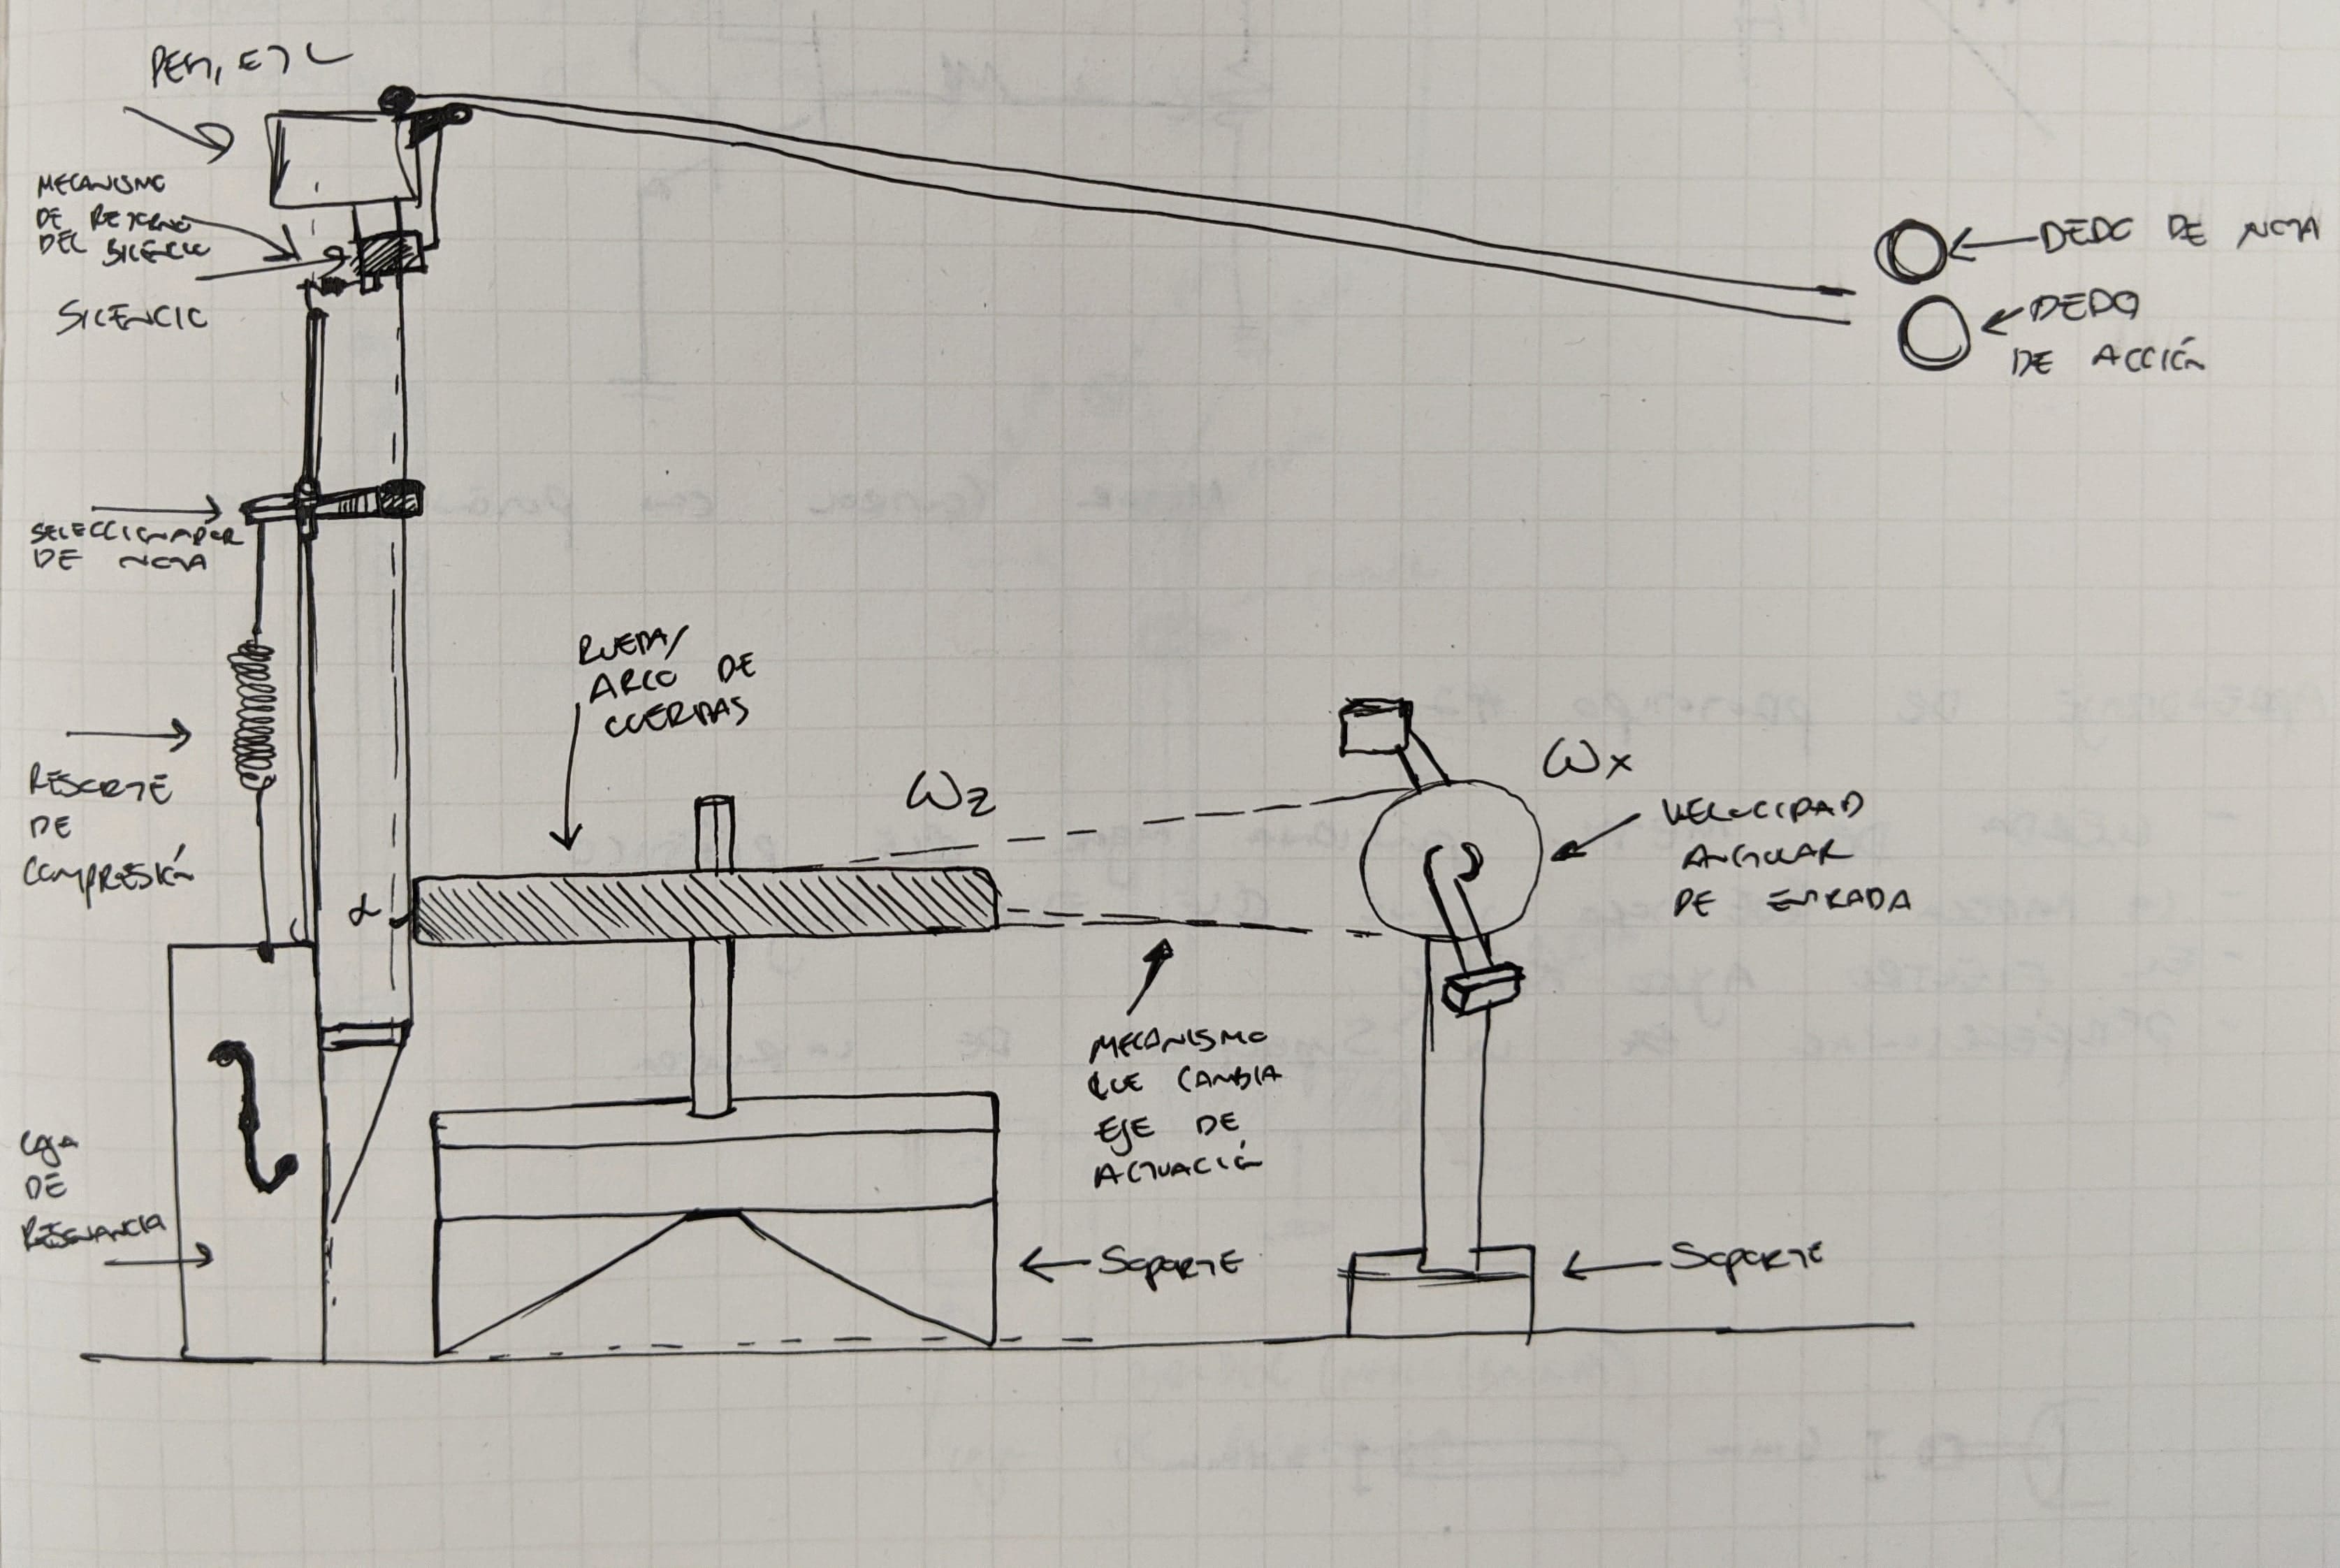
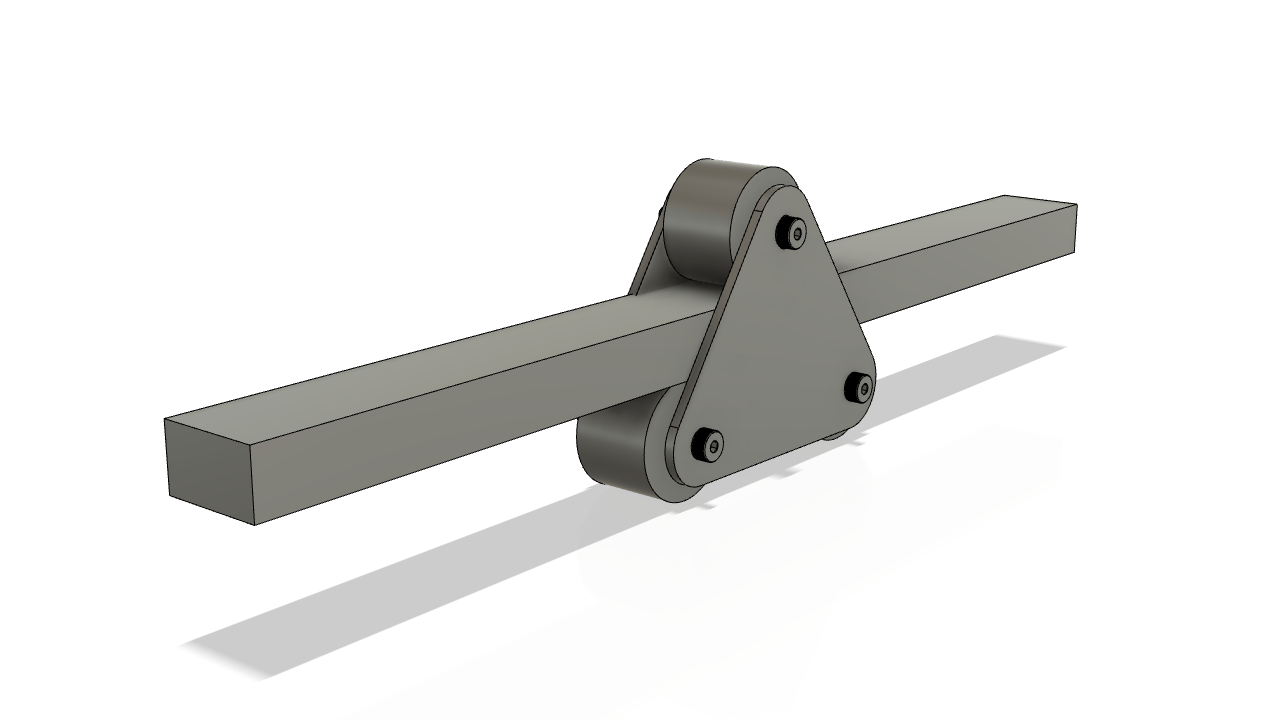
Once I had a reliable way of producing sound I set myself to device a way to change the pitch. It was important to do a reality check and explore different ways of pinching a string to change its pitch manually. Ideation, testing and iteration led me to a rolling-pincher mechanism that worked well enough. The chassis was made of a block of hardwood that was lying around, the supports were laser-cut and the rollers were designed using Fusion360 and 3D printed.

Learnings from first instrument
I performed a 5-minute piece with the first instrument in front of 30 people and the response was great. The natural screechy sound seemed to convey the stress I was hoping to and the audience enjoyed the dynamics of it. However, there were important parts missing: the sound registry was too high, I could only play one note at the time and instrument was quite small, so whatever I was doing on stage wouldn't translate to an audience larger than 30 people. The stepper motor I initially used was giving very slow RPMs (as steppers do), the circuit was fragile, the rolling mechanism had alignment issues and the whole thing was on a tabletop facing me instead of the audience.
With these learnings, I started the second instrument.
Design of the second instrument
The original sound character I set myself to achieve was definitely lower and more layered than the one the first instrument was producing. After conducting further research on acoustics, I concluded that the resonant body was too rigid and it was only allowing high frequencies. It also had 'parasite' frequencies introduced by the not-so-great rolling mechanism.
All the research and experimentation led me to point were the components were clear: A string, a fretboard and a resonance box. These are present in almost all string instruments, but I wanted to push the design to a bolder direction and avoid making another guitar.
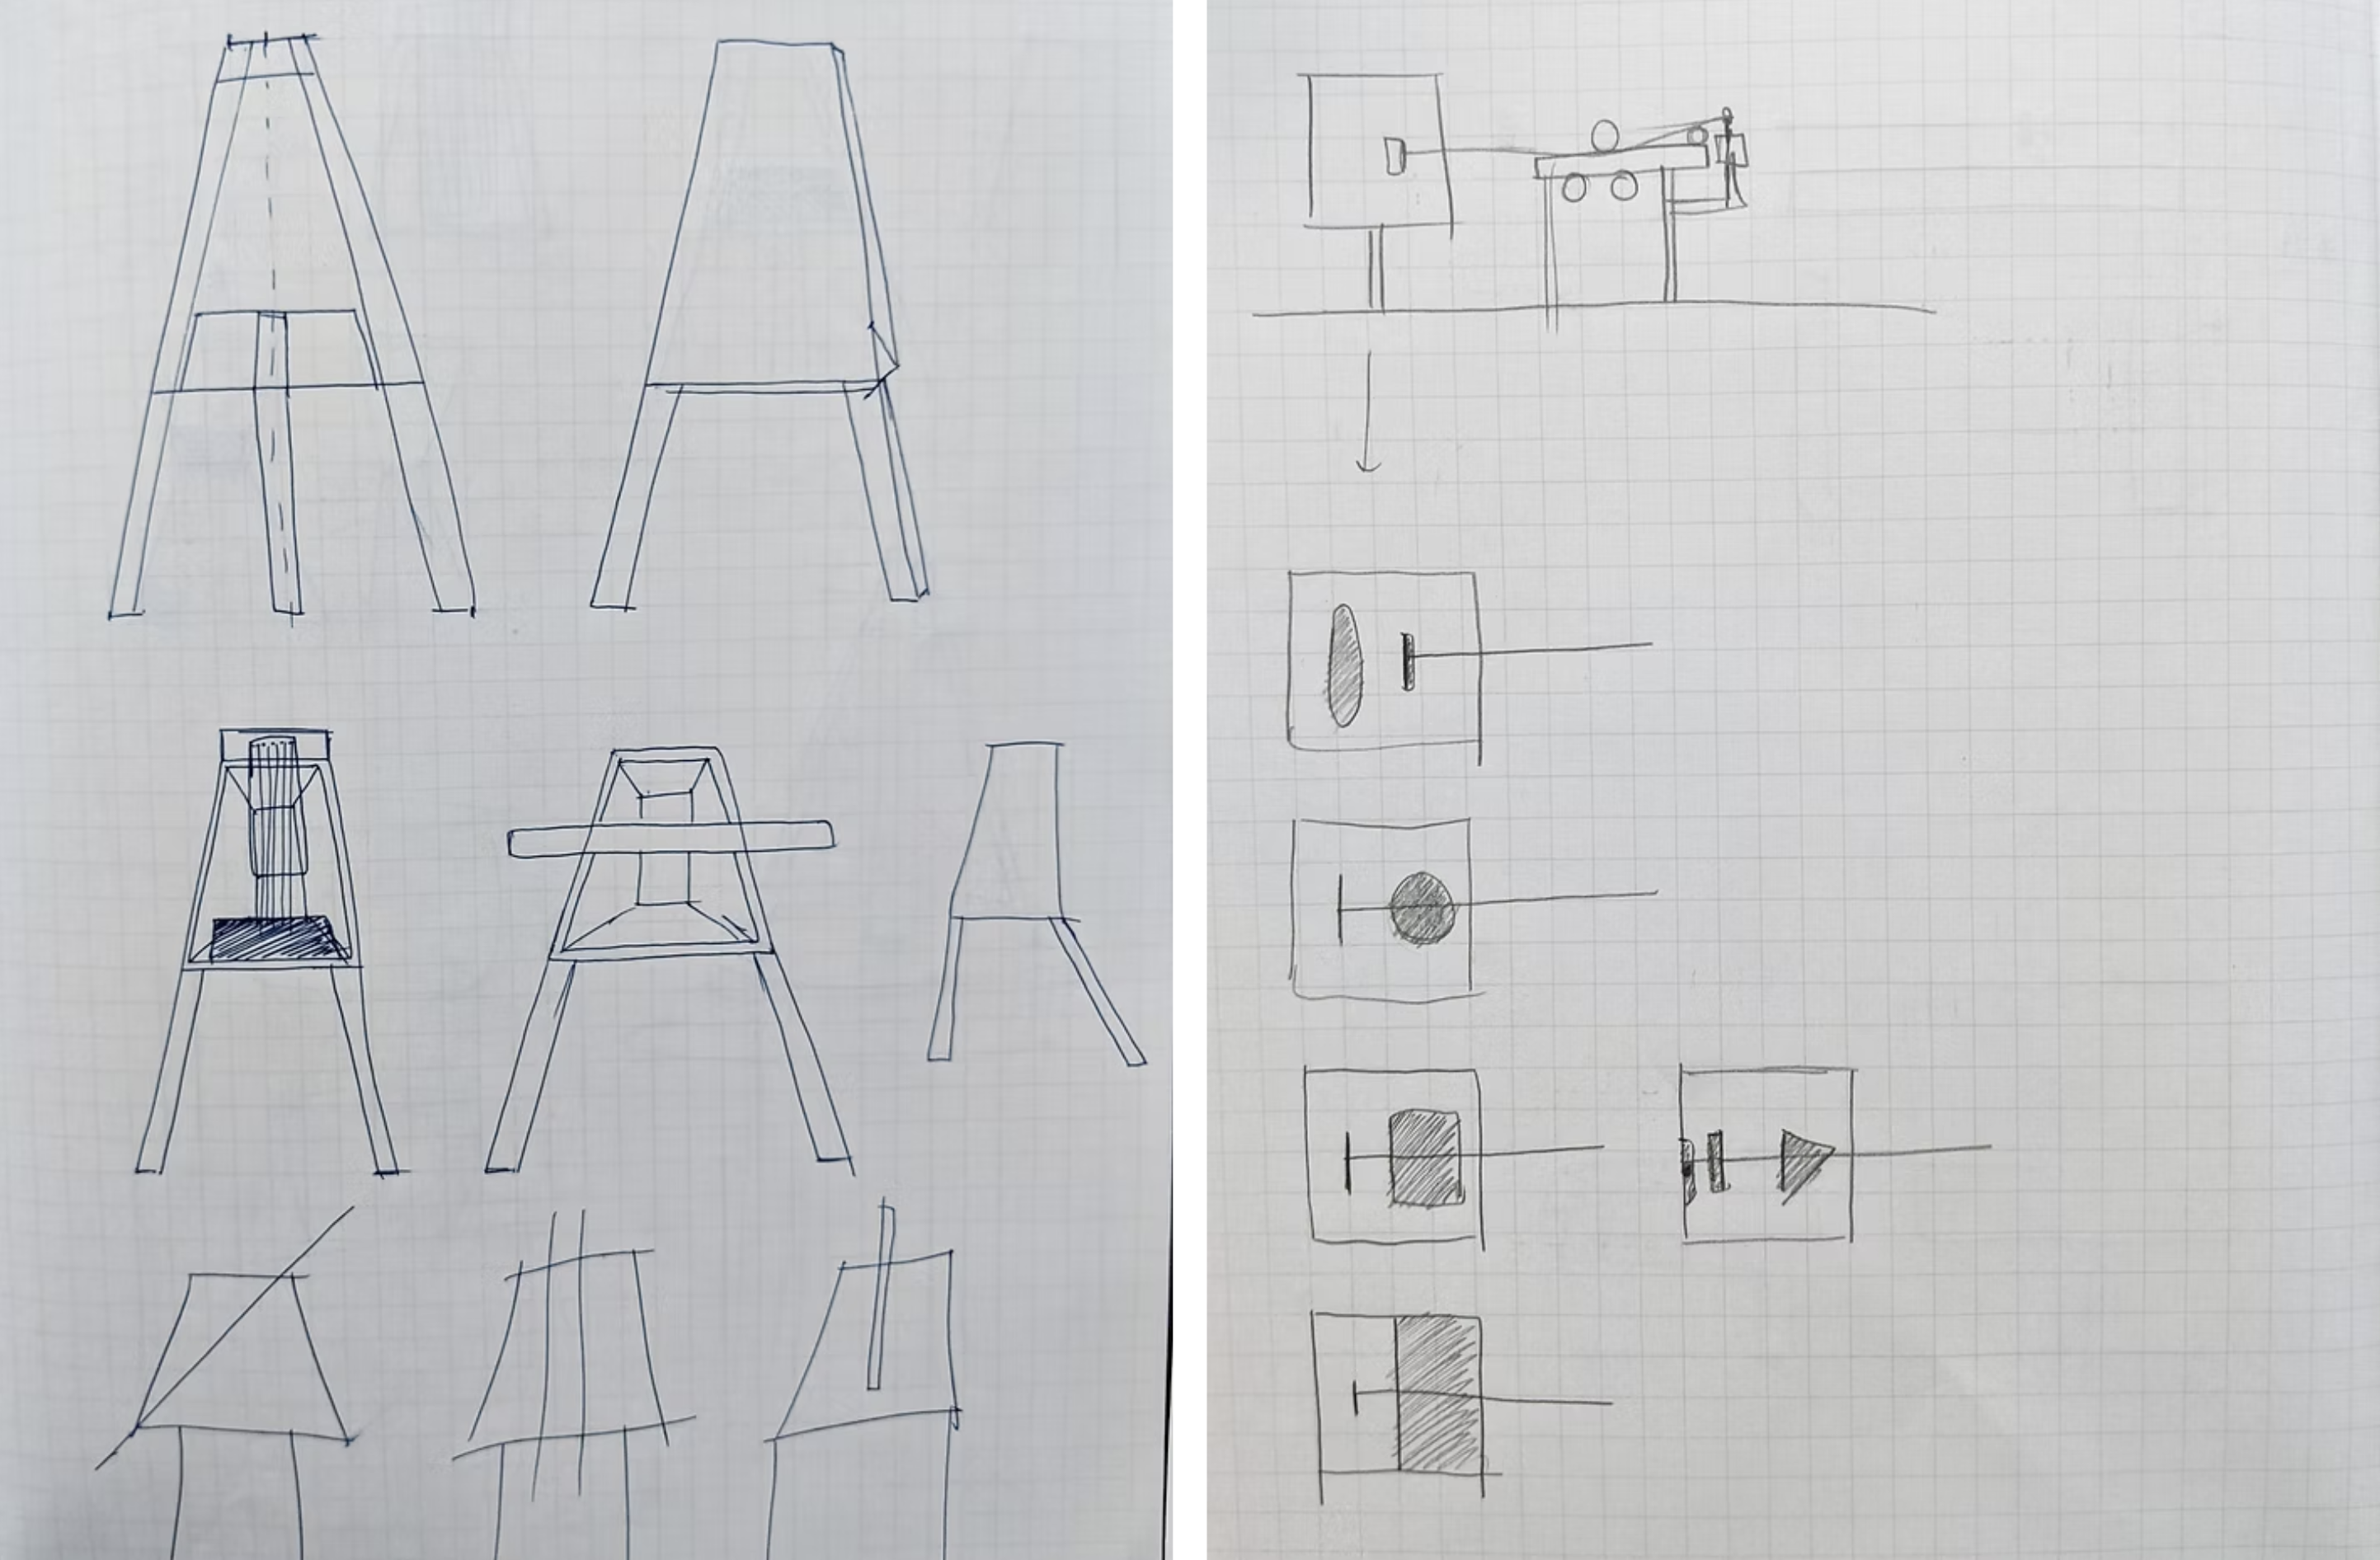
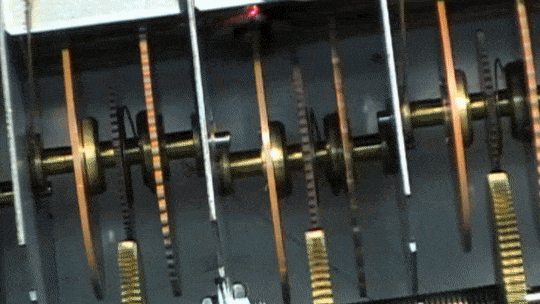
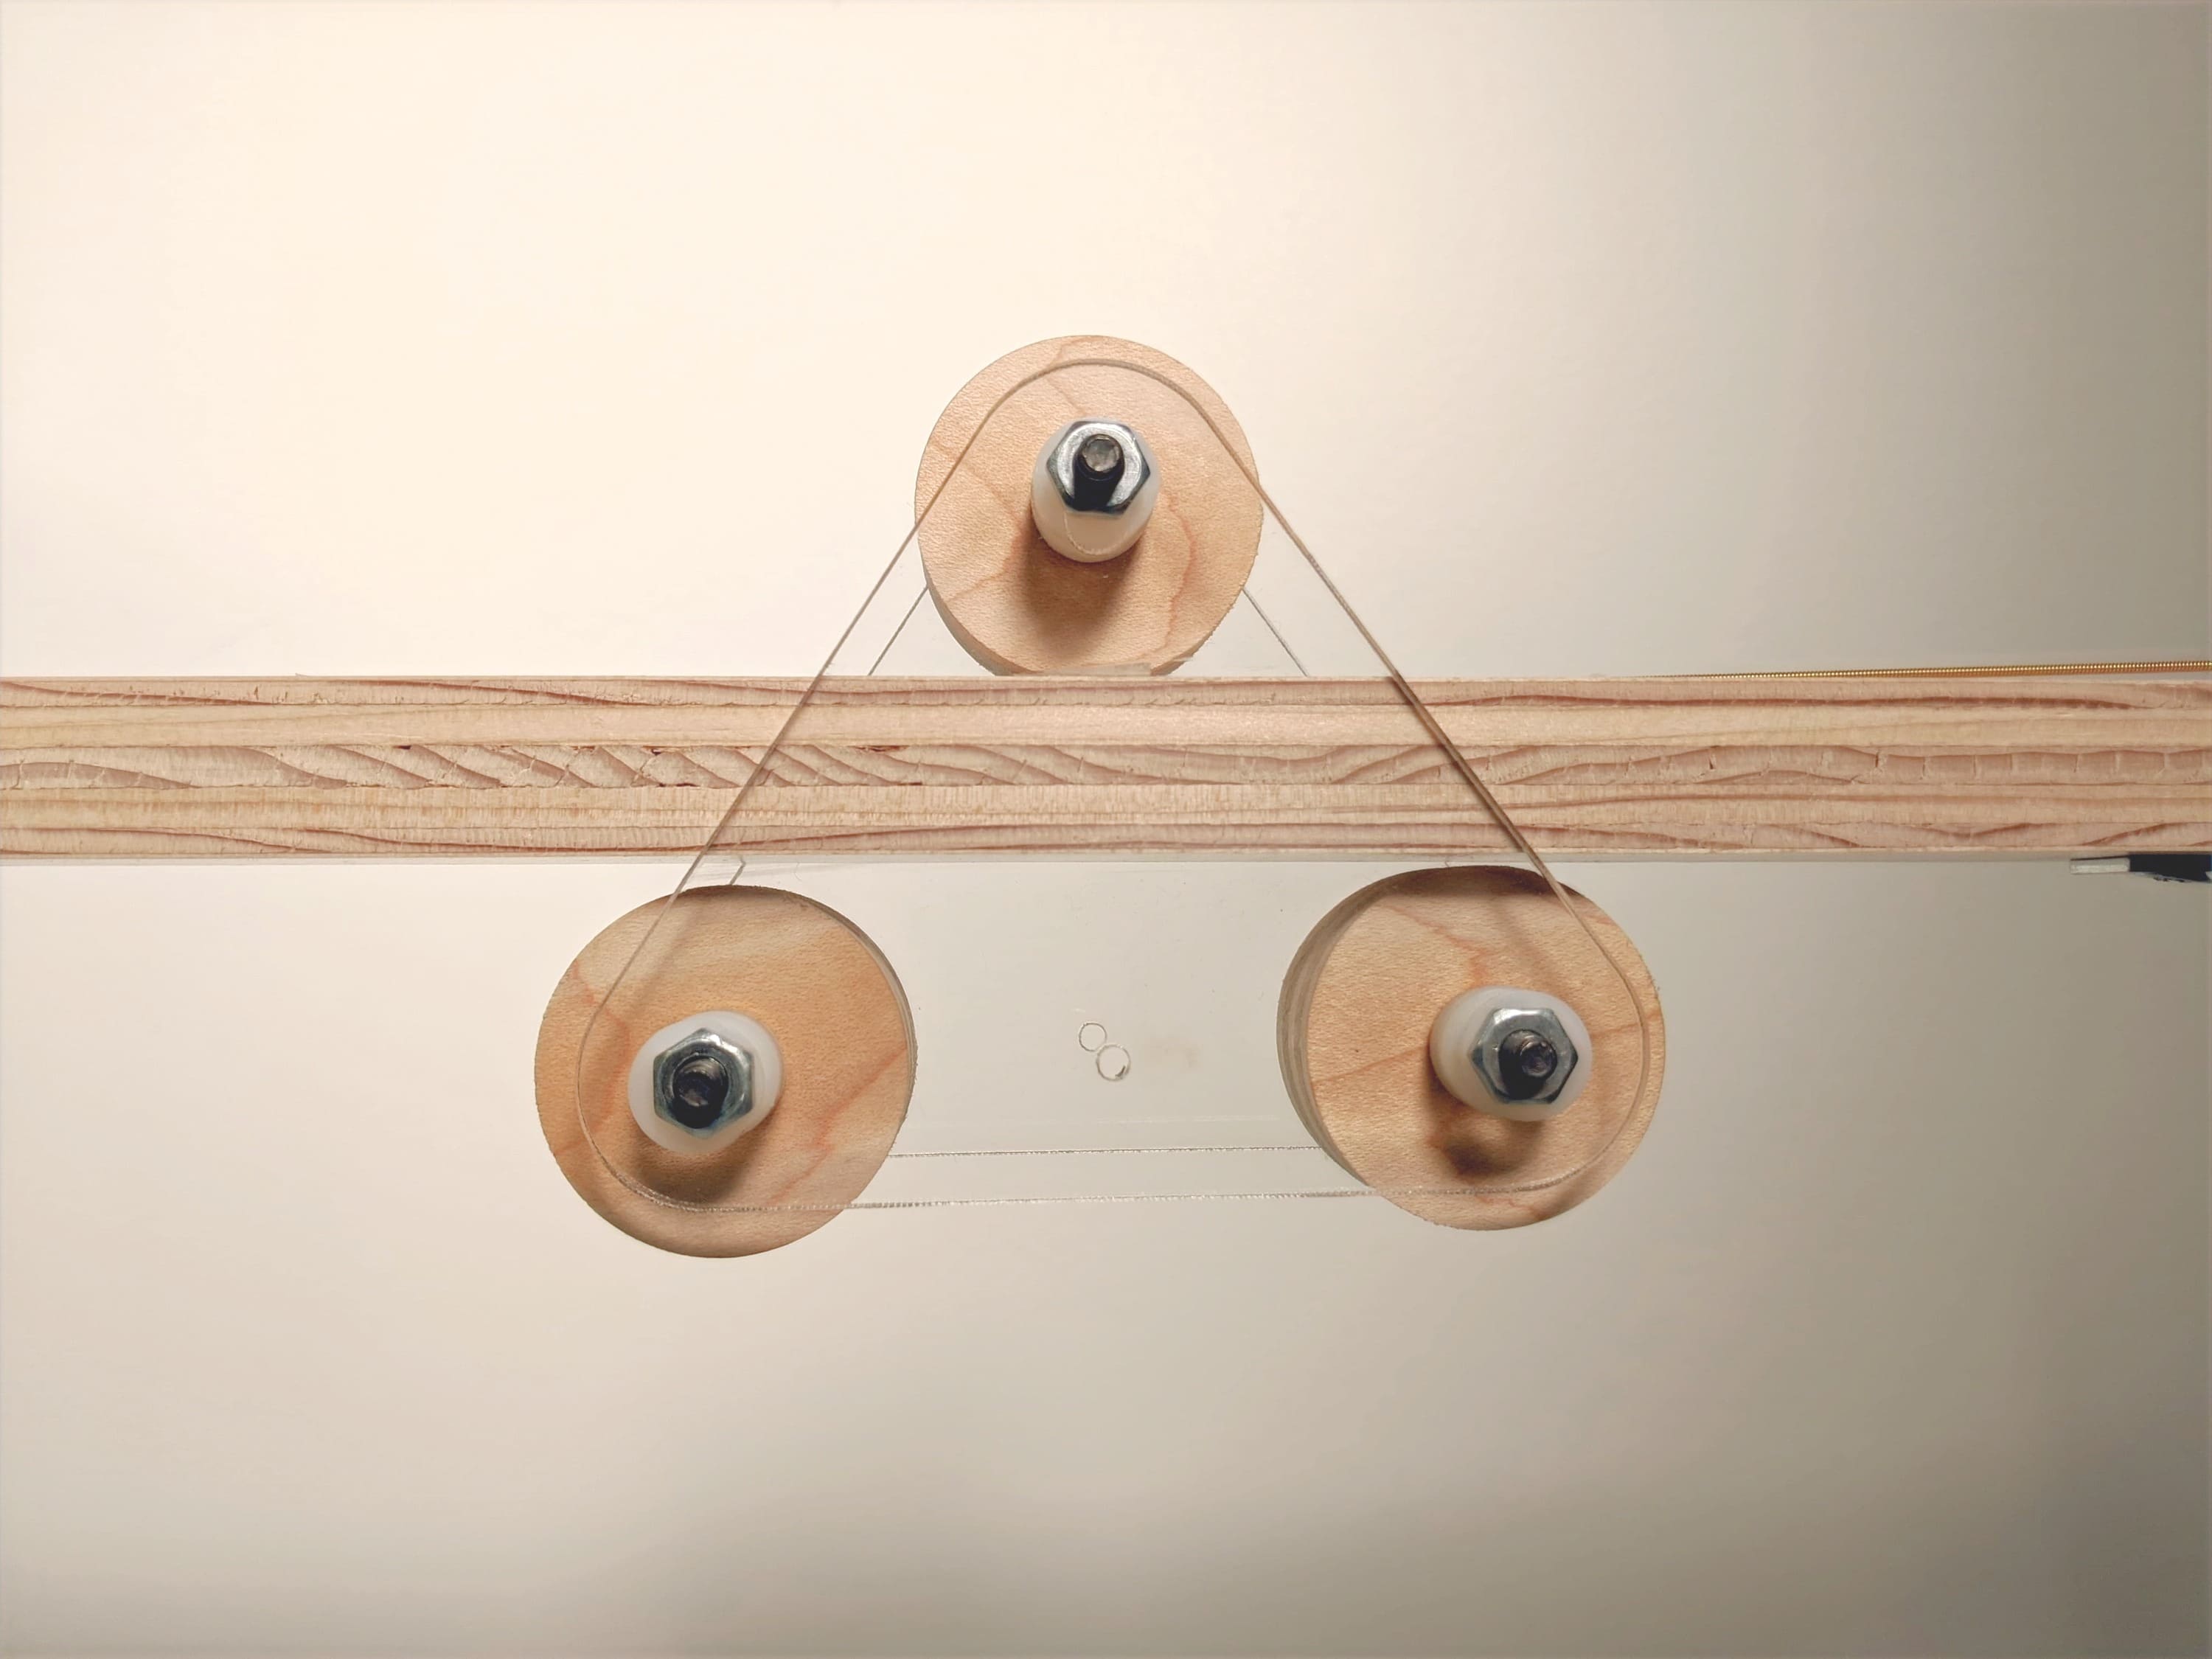
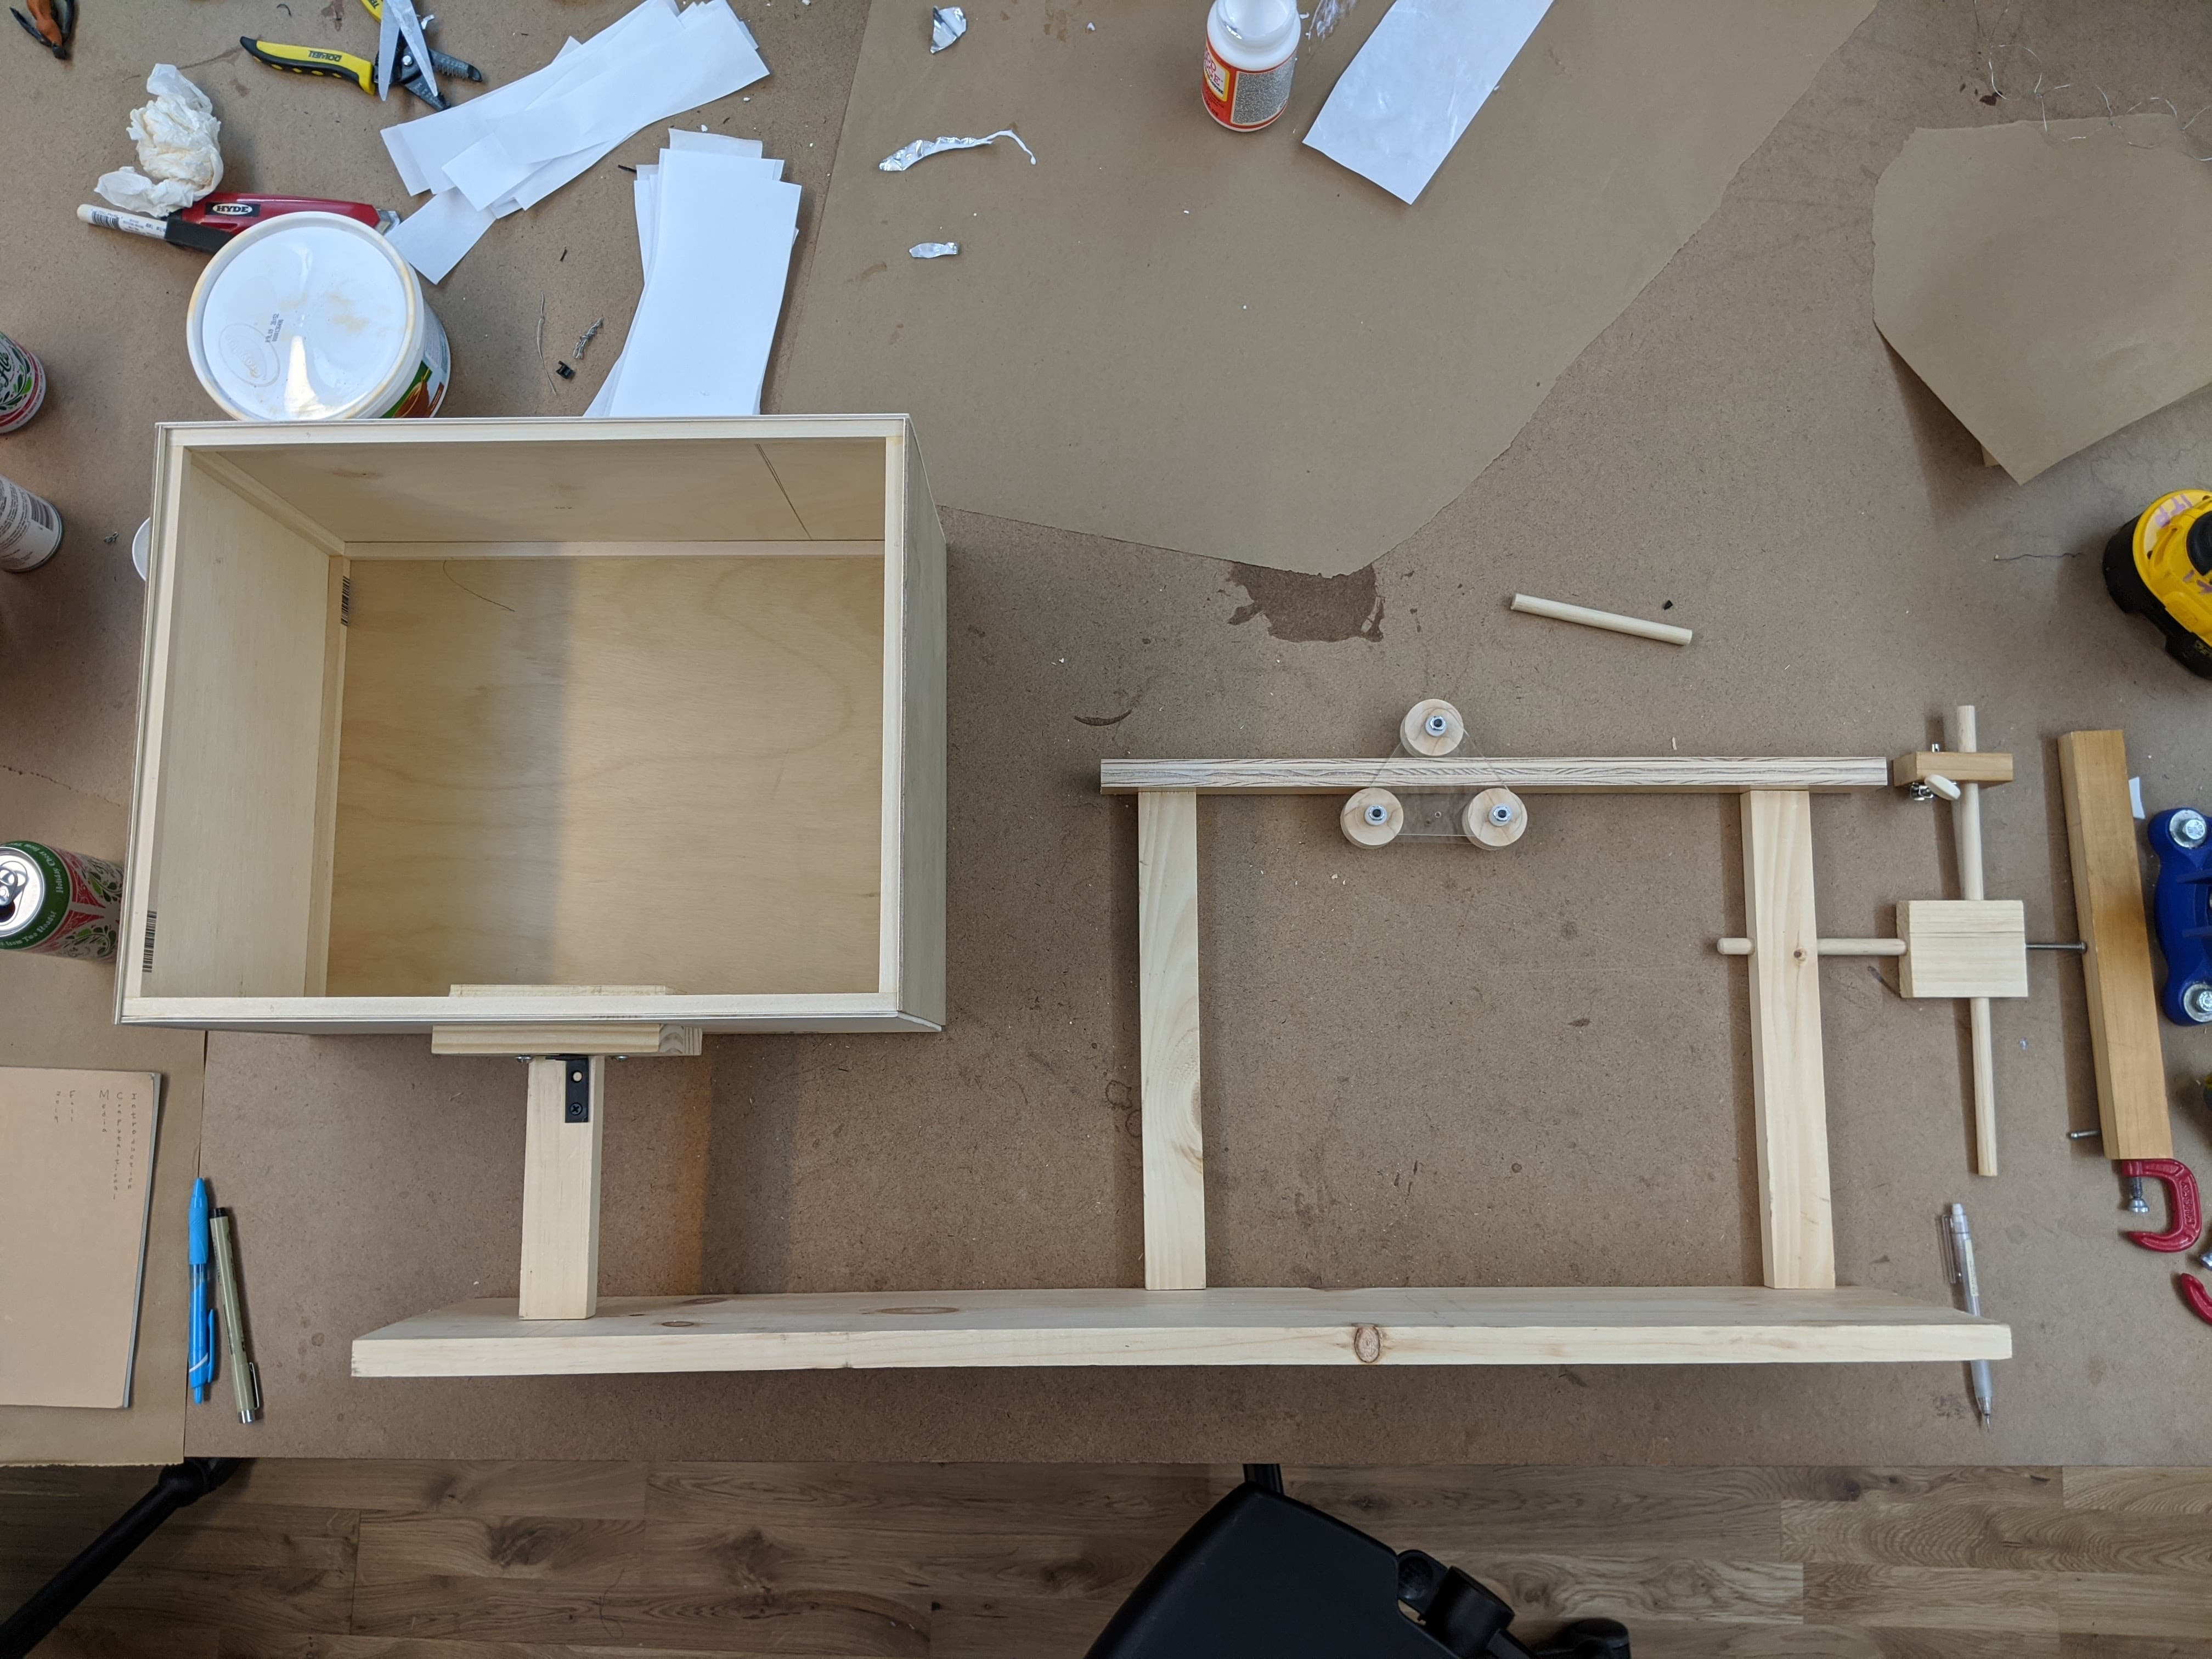
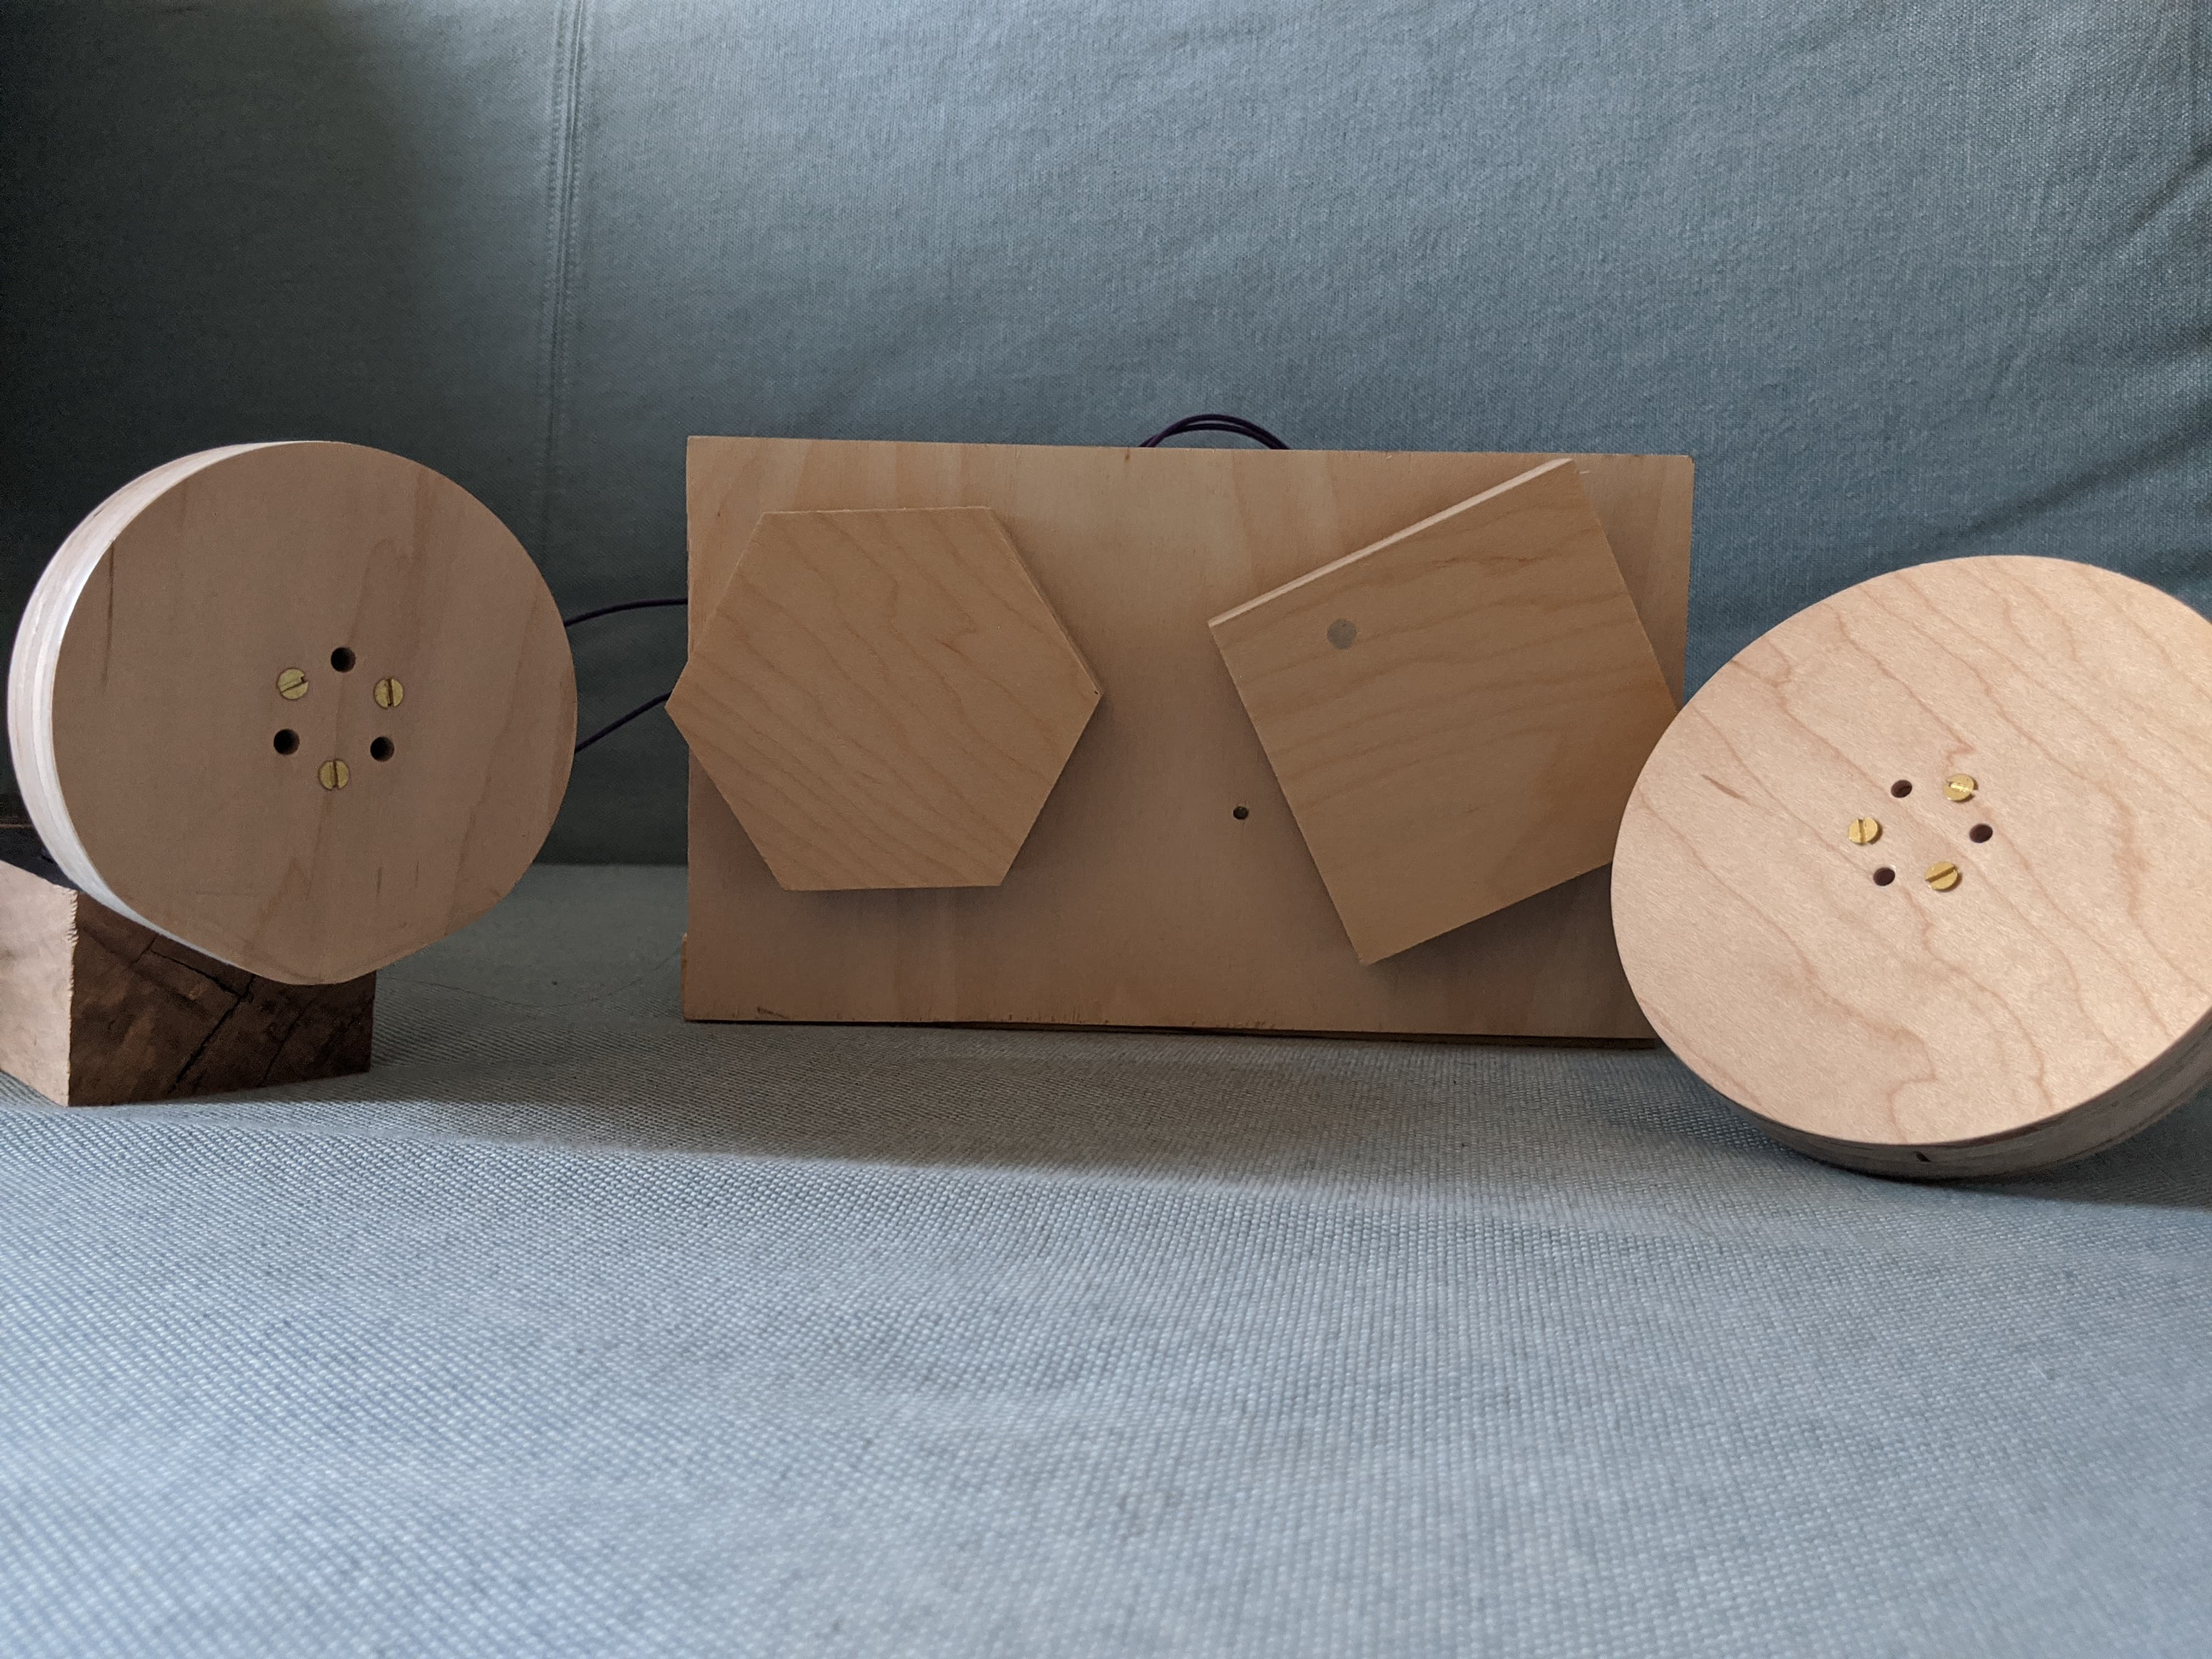
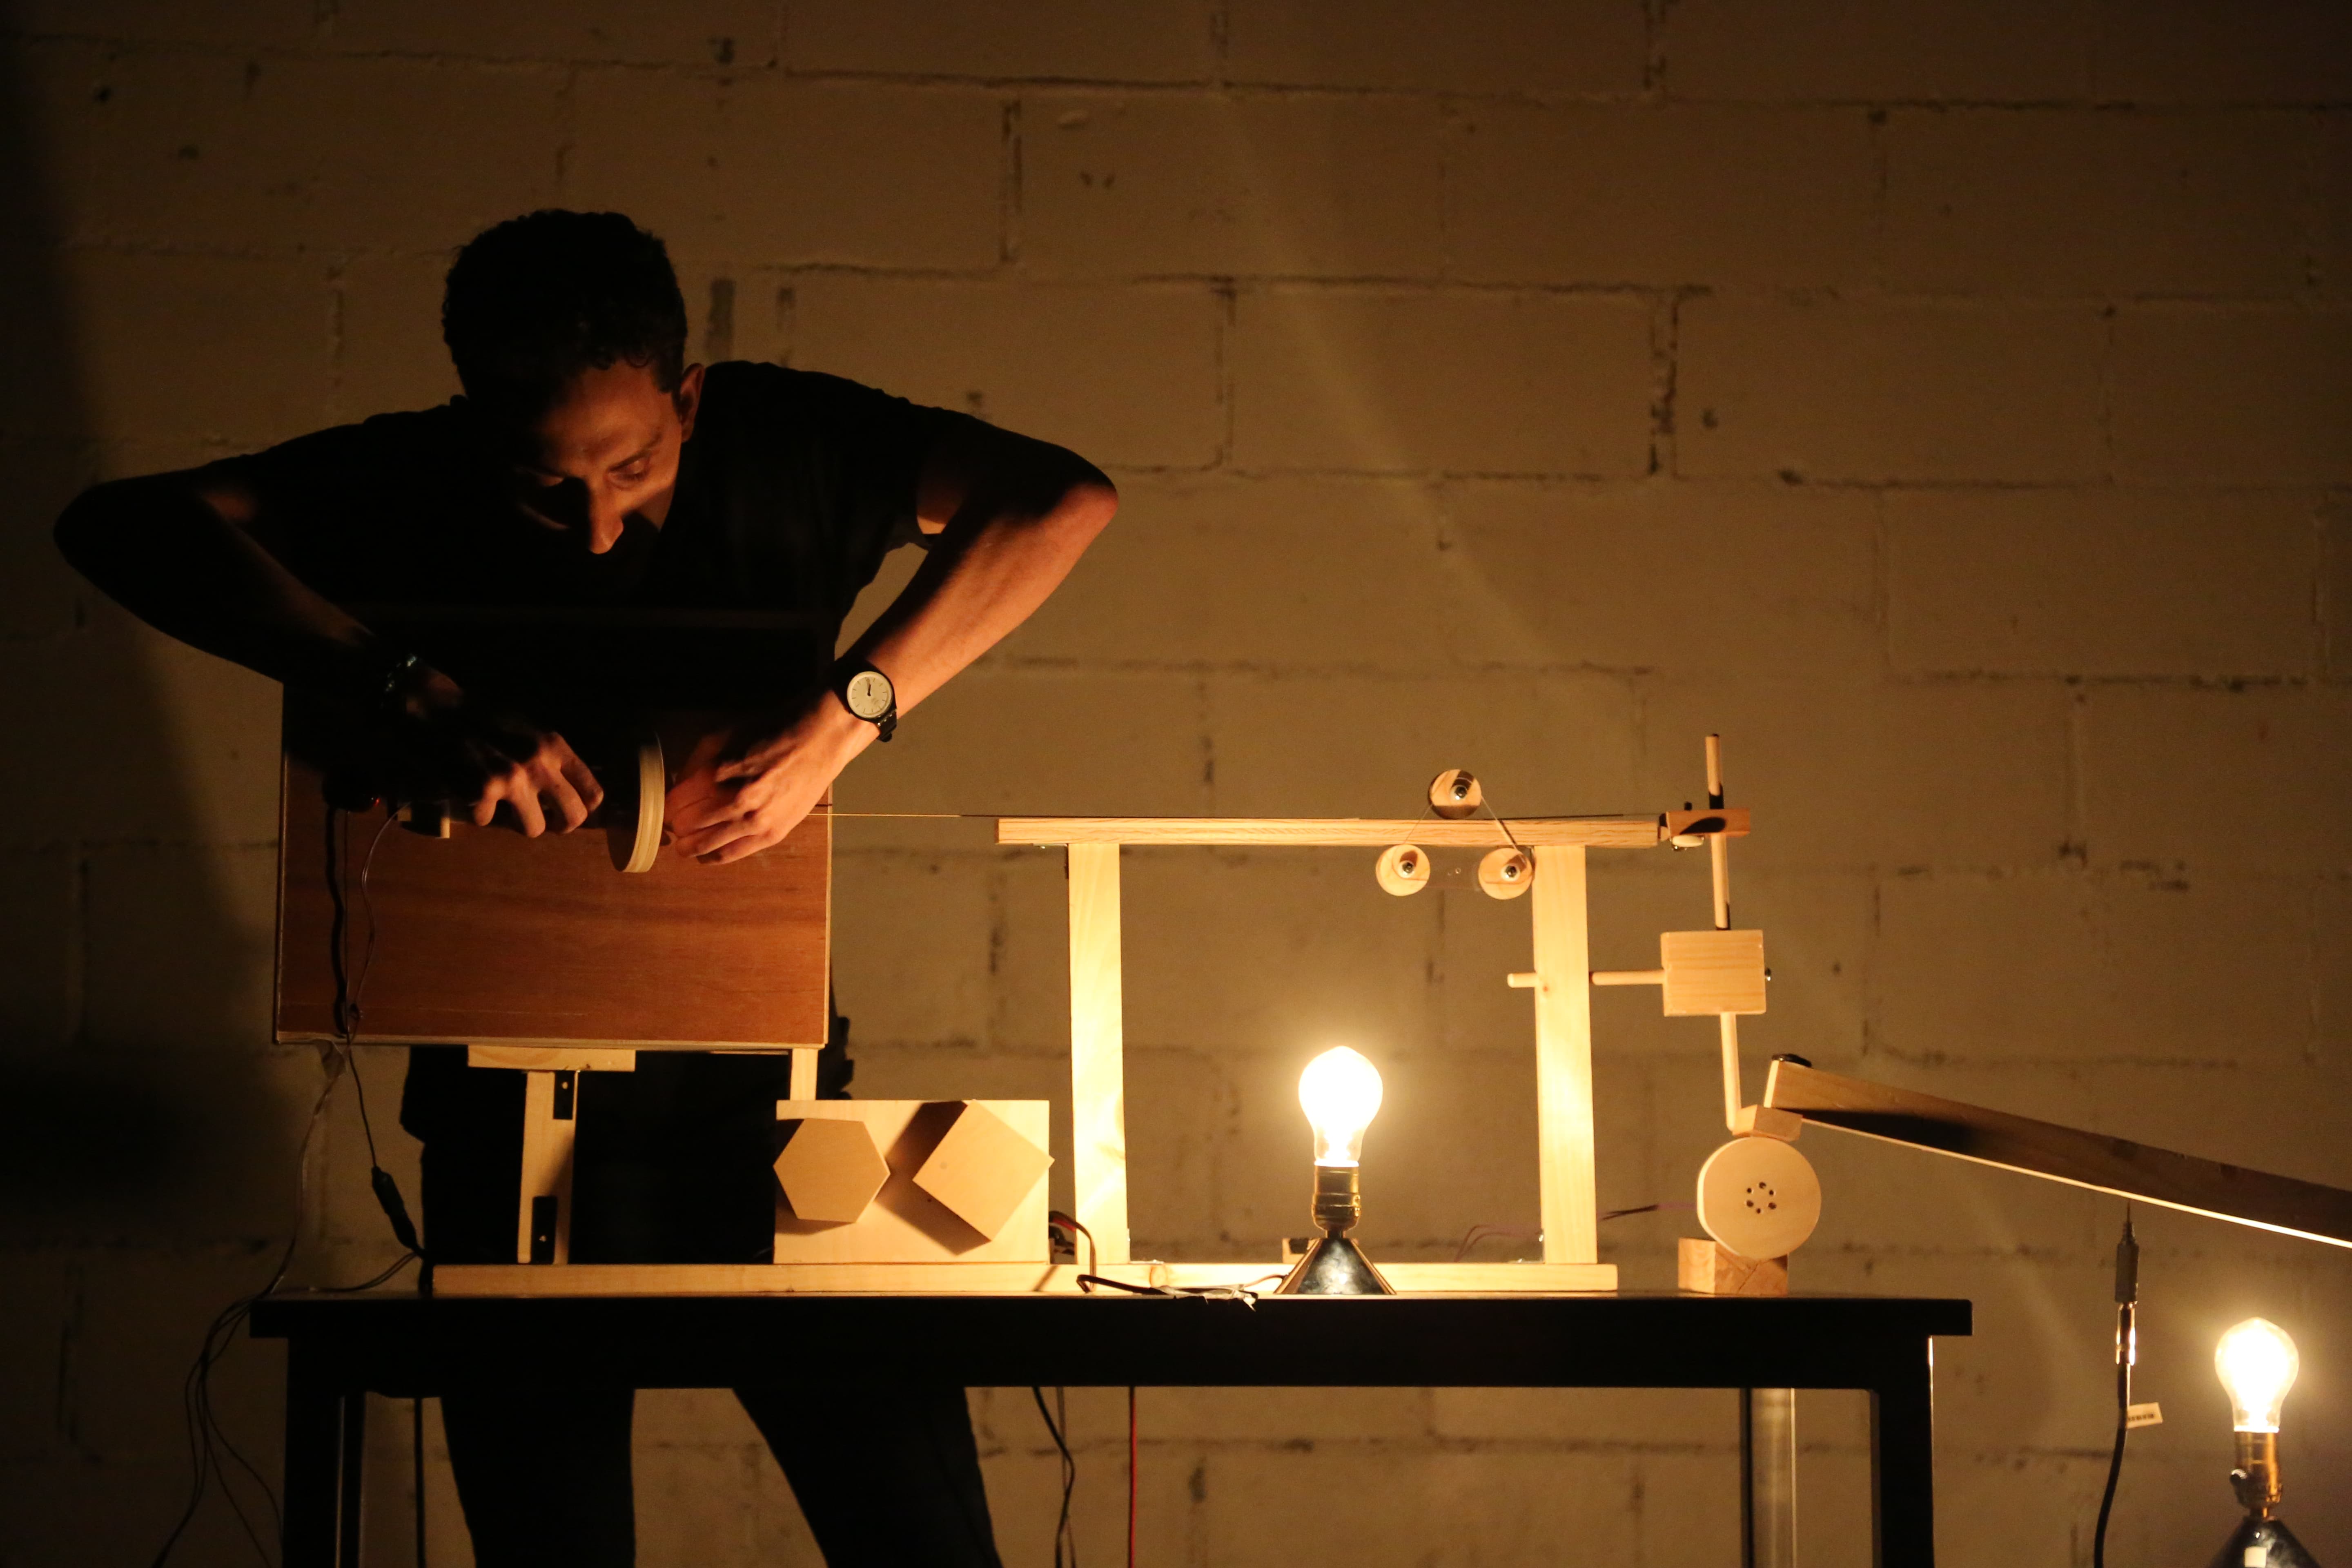
Once the form was found, I spent some time improving the rolling-pincher mechanism. The second iteration was designed to be more stable and to roll on a horizontal track instead of a vertical one. I used a triangular chassis, shoulder screws and CNC'd wooden wheels to keep tolerances as low as possible. Each shoulder screw functions as an axle for the wheels, and 1/16" plastic washers allow to calibrate the device when deformation from the string's tension is introduced – it uses 22 different parts to achieve a firm, comfortable and predictable motion.
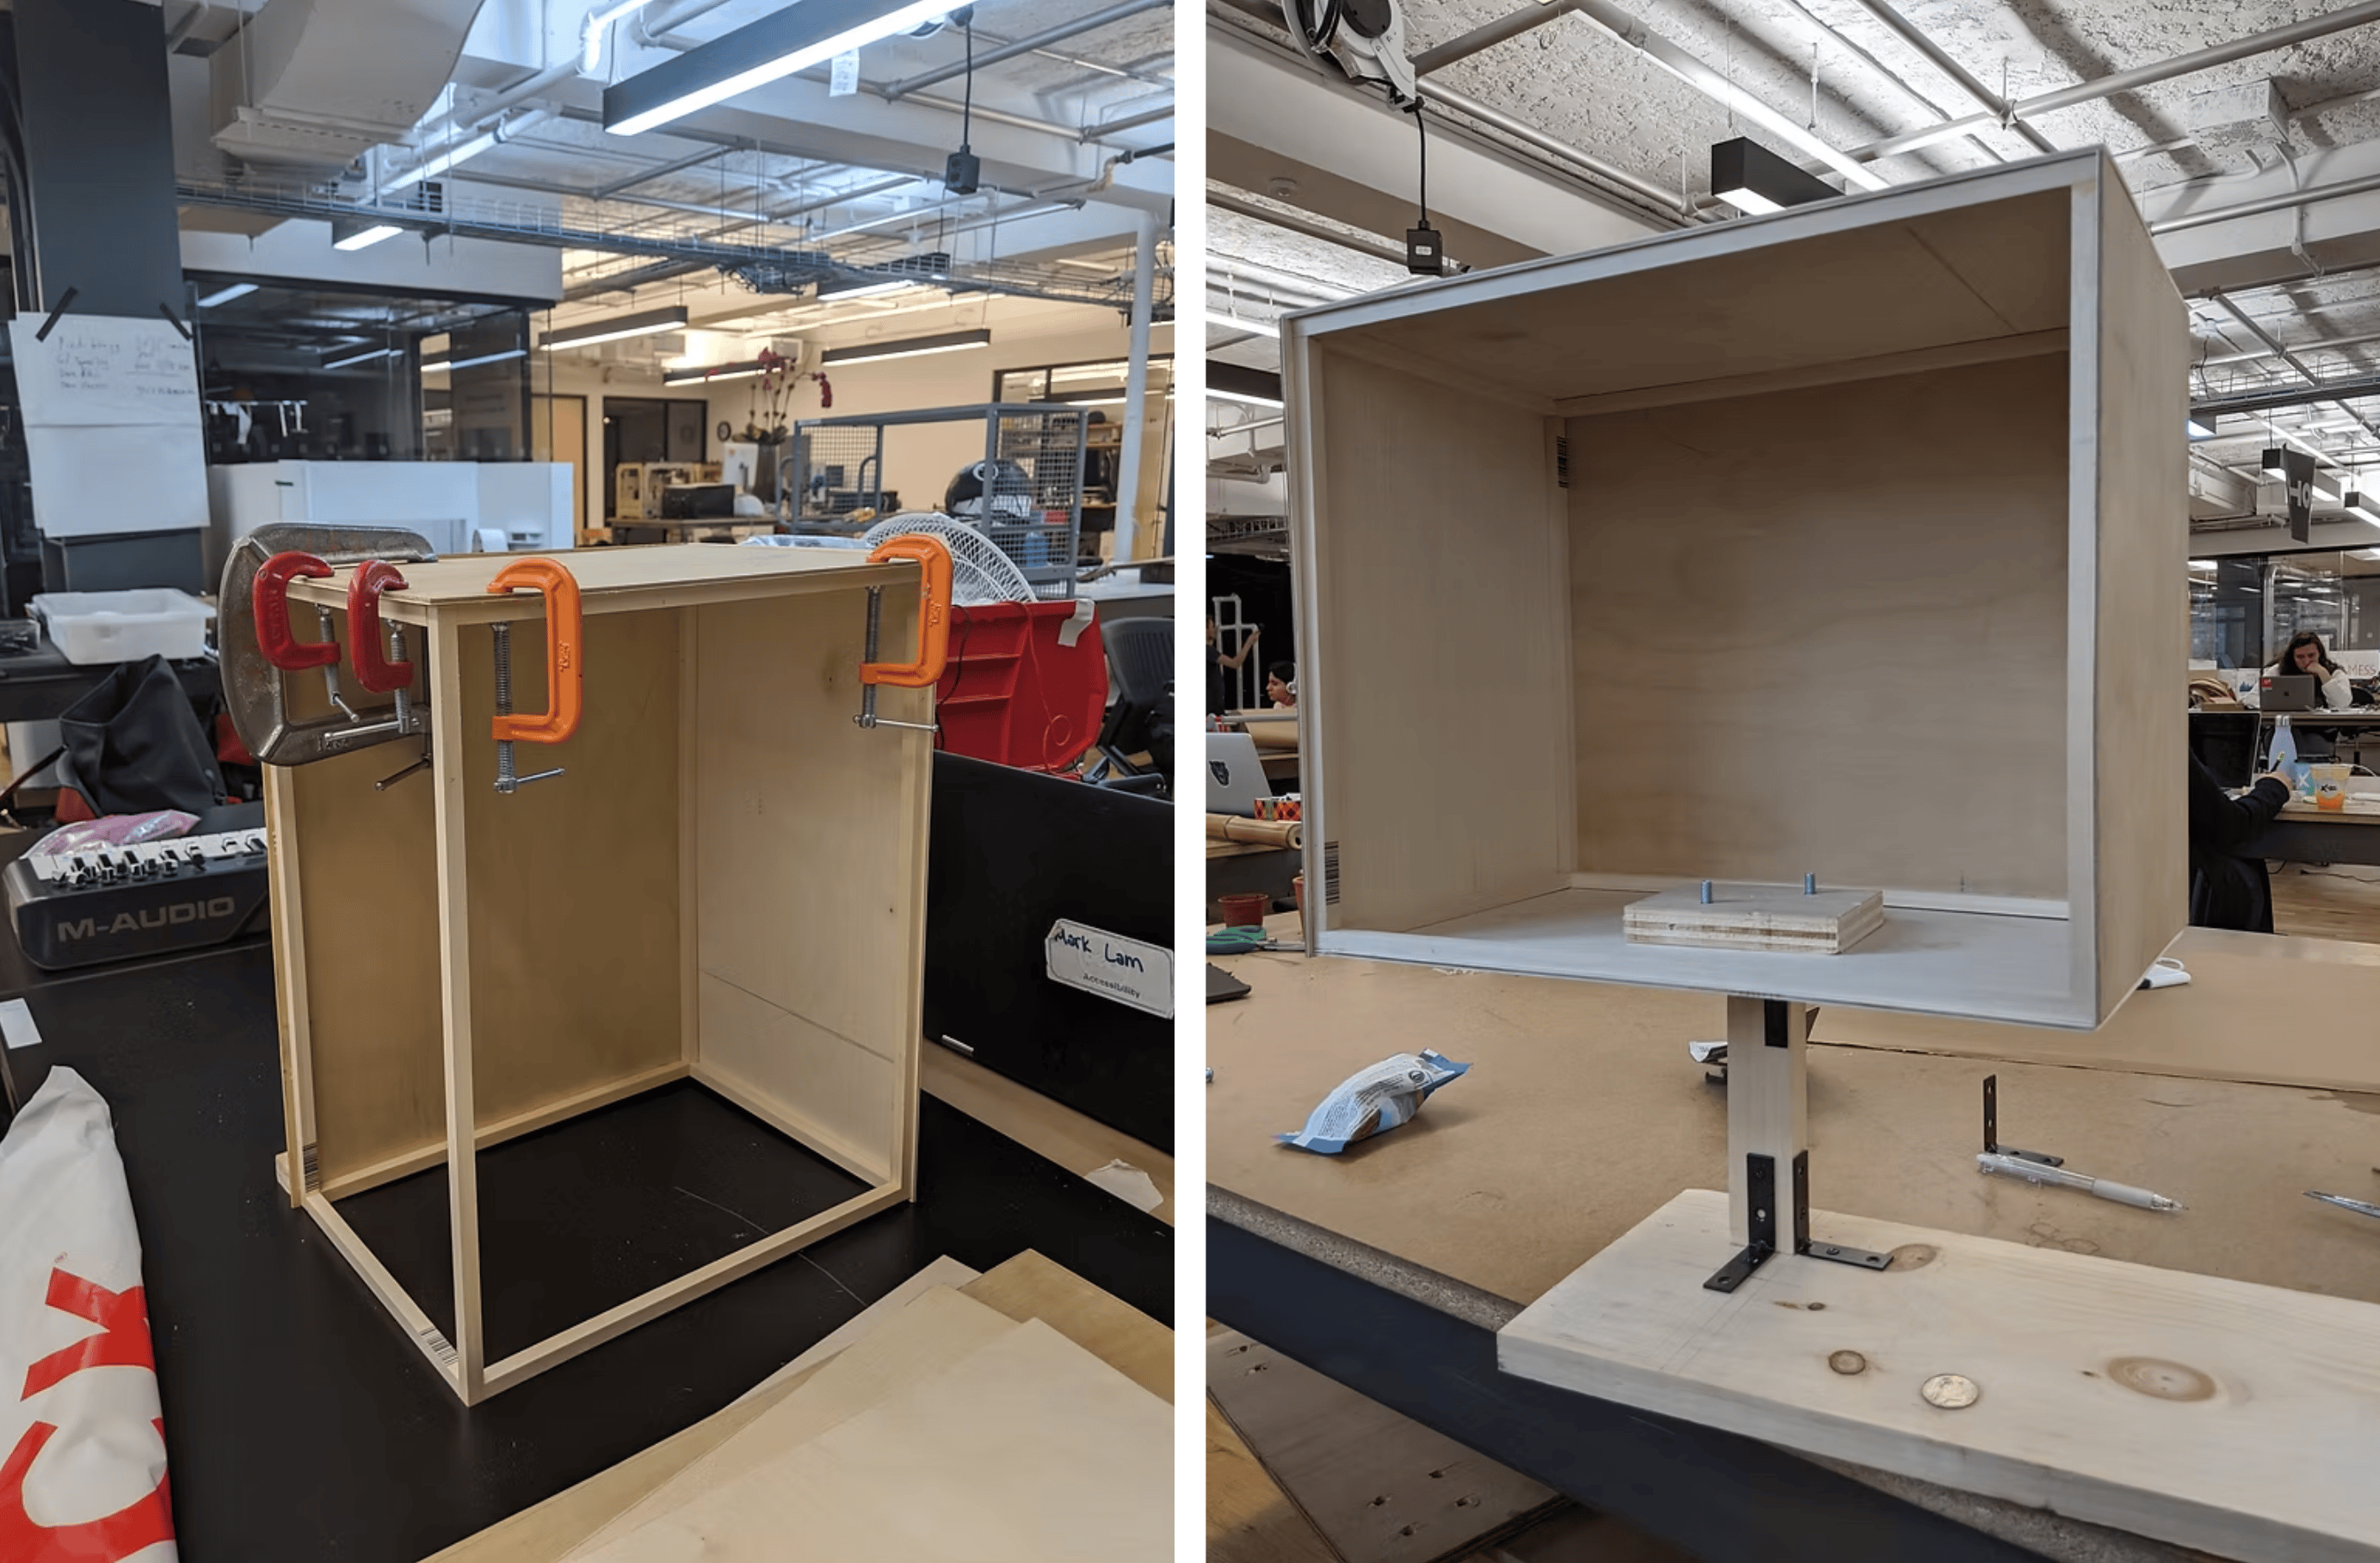
Construction
The construction of the instrument needed both traditional woodworking methods as well as digital fabrication such as a CNC, laser cutter and 3D printer.
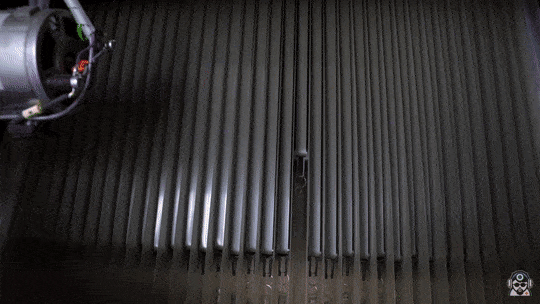
The resonance chamber was constructed with a birch frame and tone-wood faces. This gives sufficient structure without dampening low frequencies. The suspended fretboard was cut using a CNC to achieve the necessary precision that the roller needed. The string is held up from two points: a string peg (used one from a traditional guitar) and the bridge. The bridge was made from a wooden dowel and glued to the face of the chamber. Finally, the string nut structure was built using different woods, a drill press & band saw, and uses an adjustable set screw mechanism for calibrations and adjustments.
Percussion
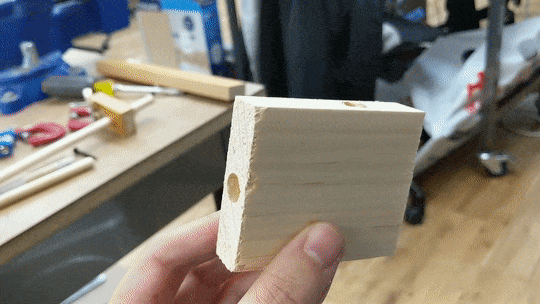
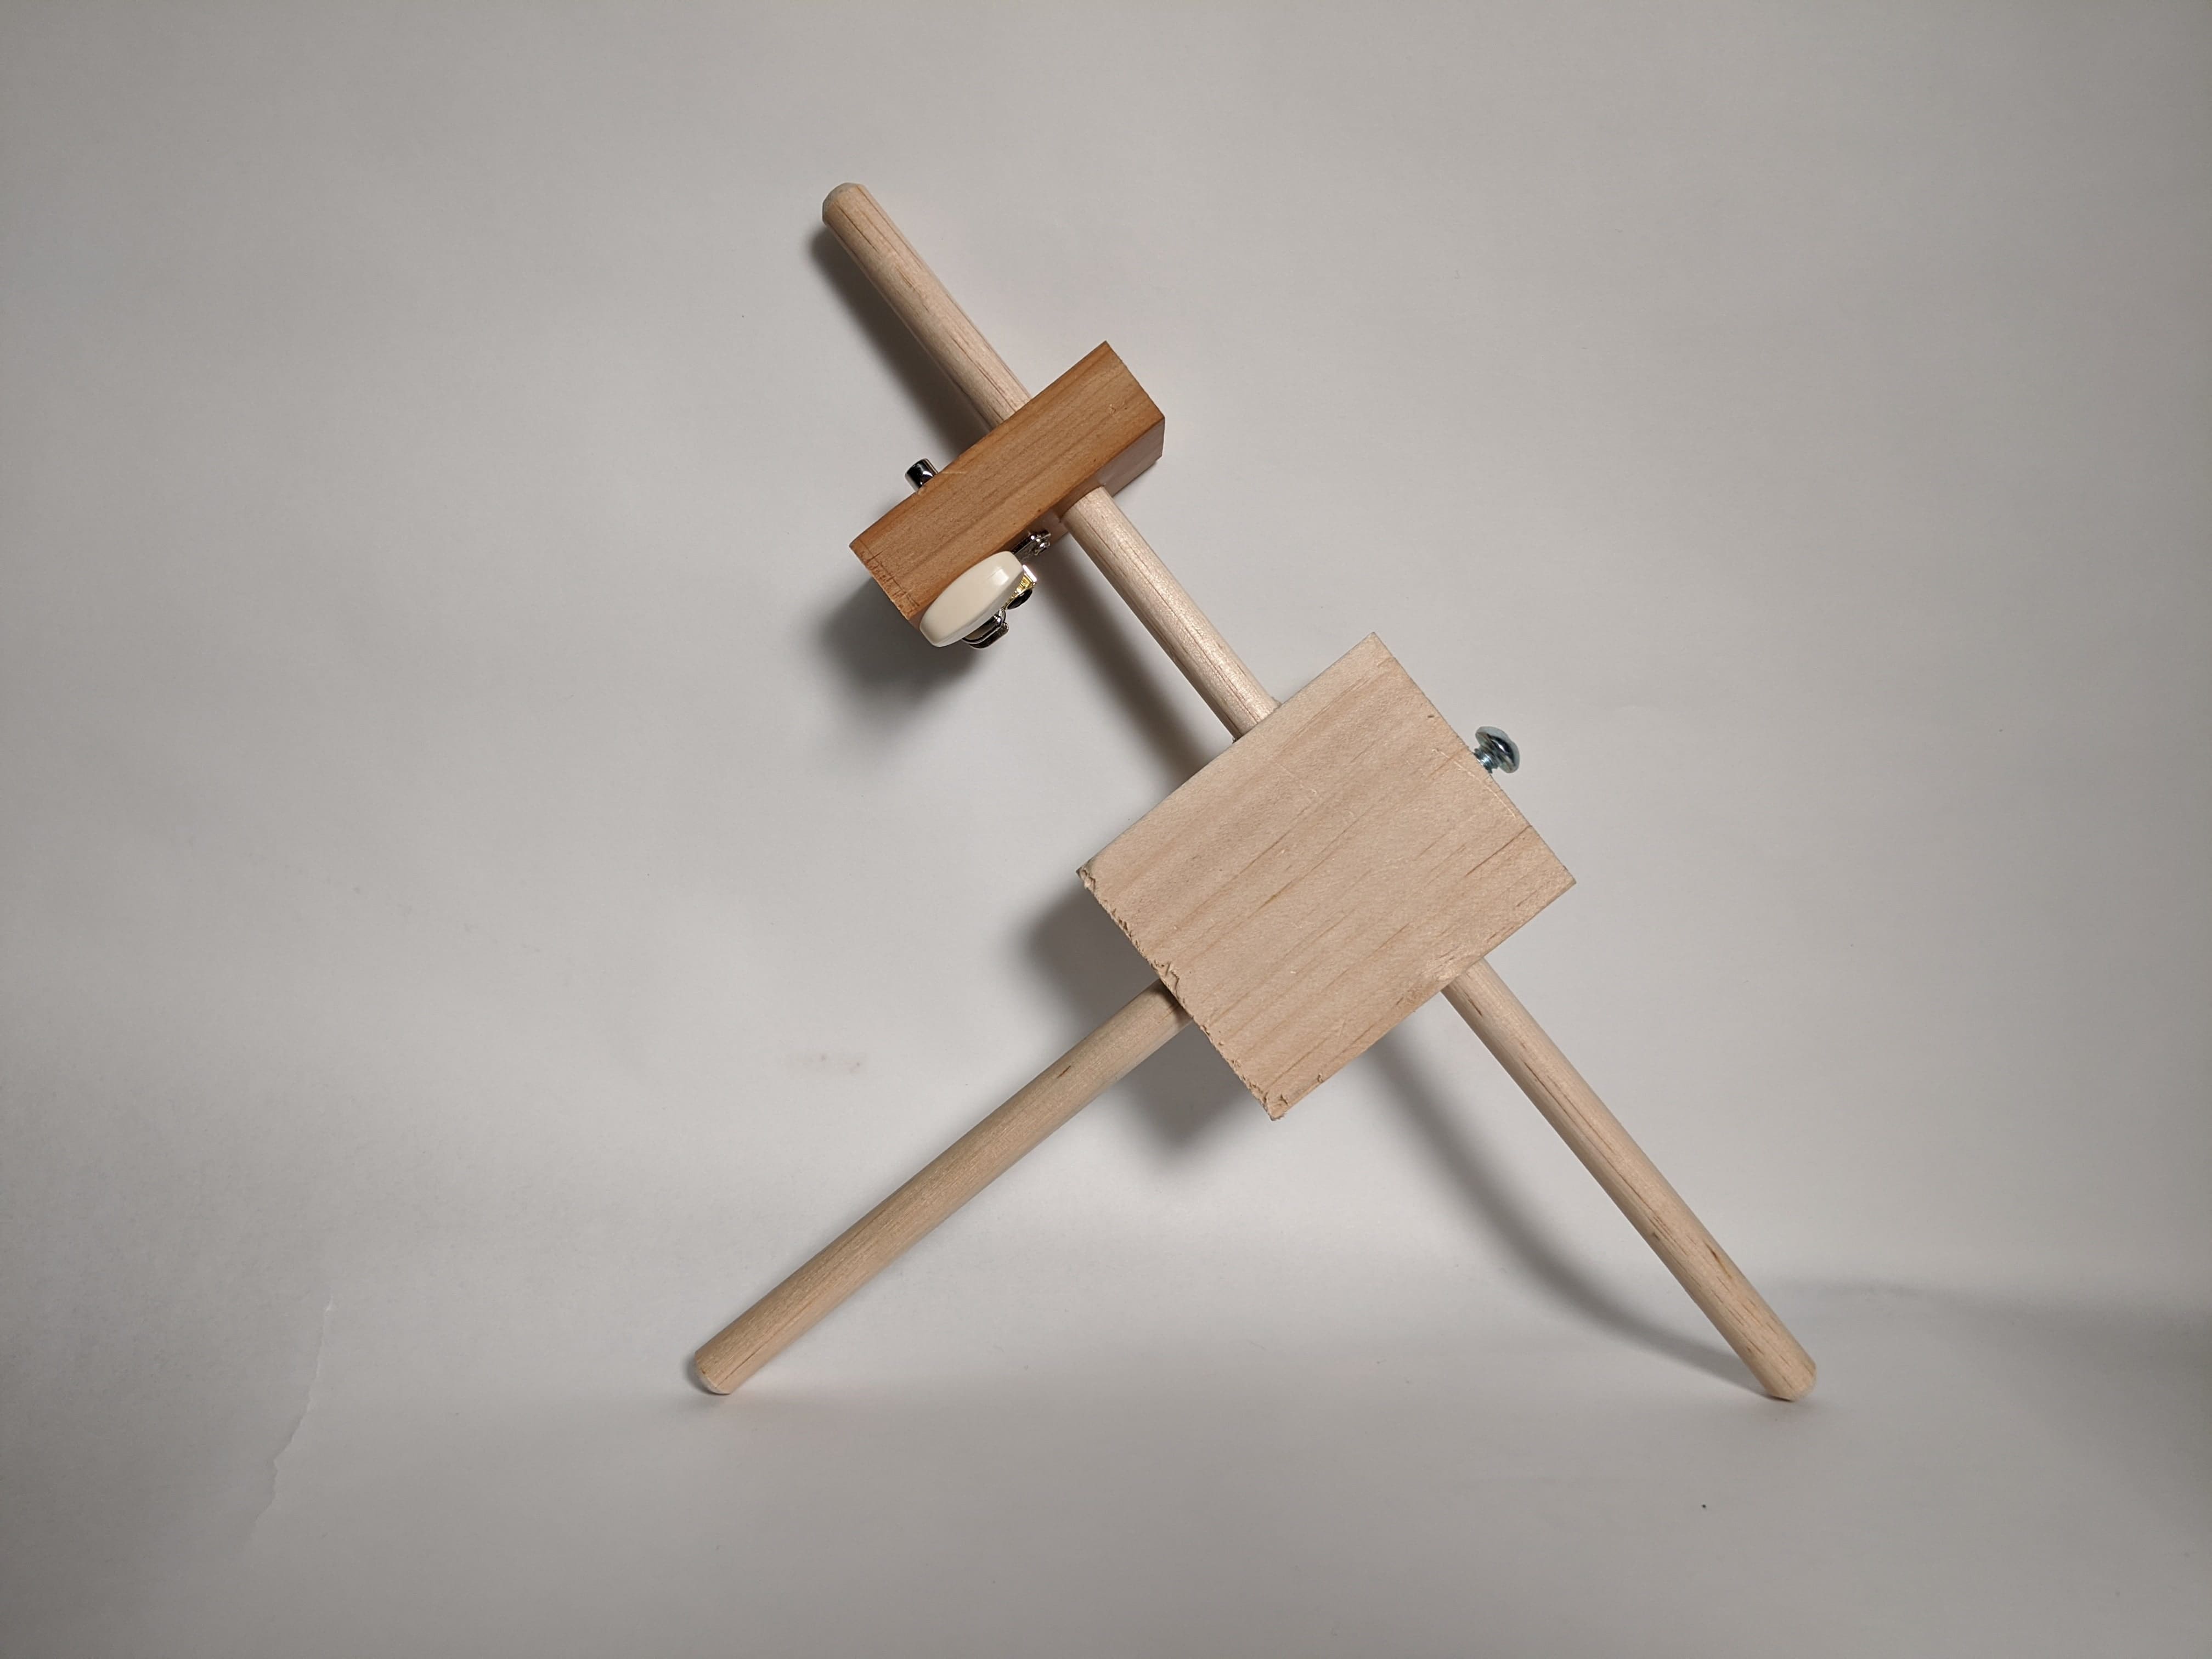
One of the main weaknesses from the first instrument built was the lack of a percussive element. The melodic component was there, but I was lacking a way of carrying a beat and tempo to create a more engaging experience for the audience. I designed a complementary instrument that produces a variable-BPM beat.

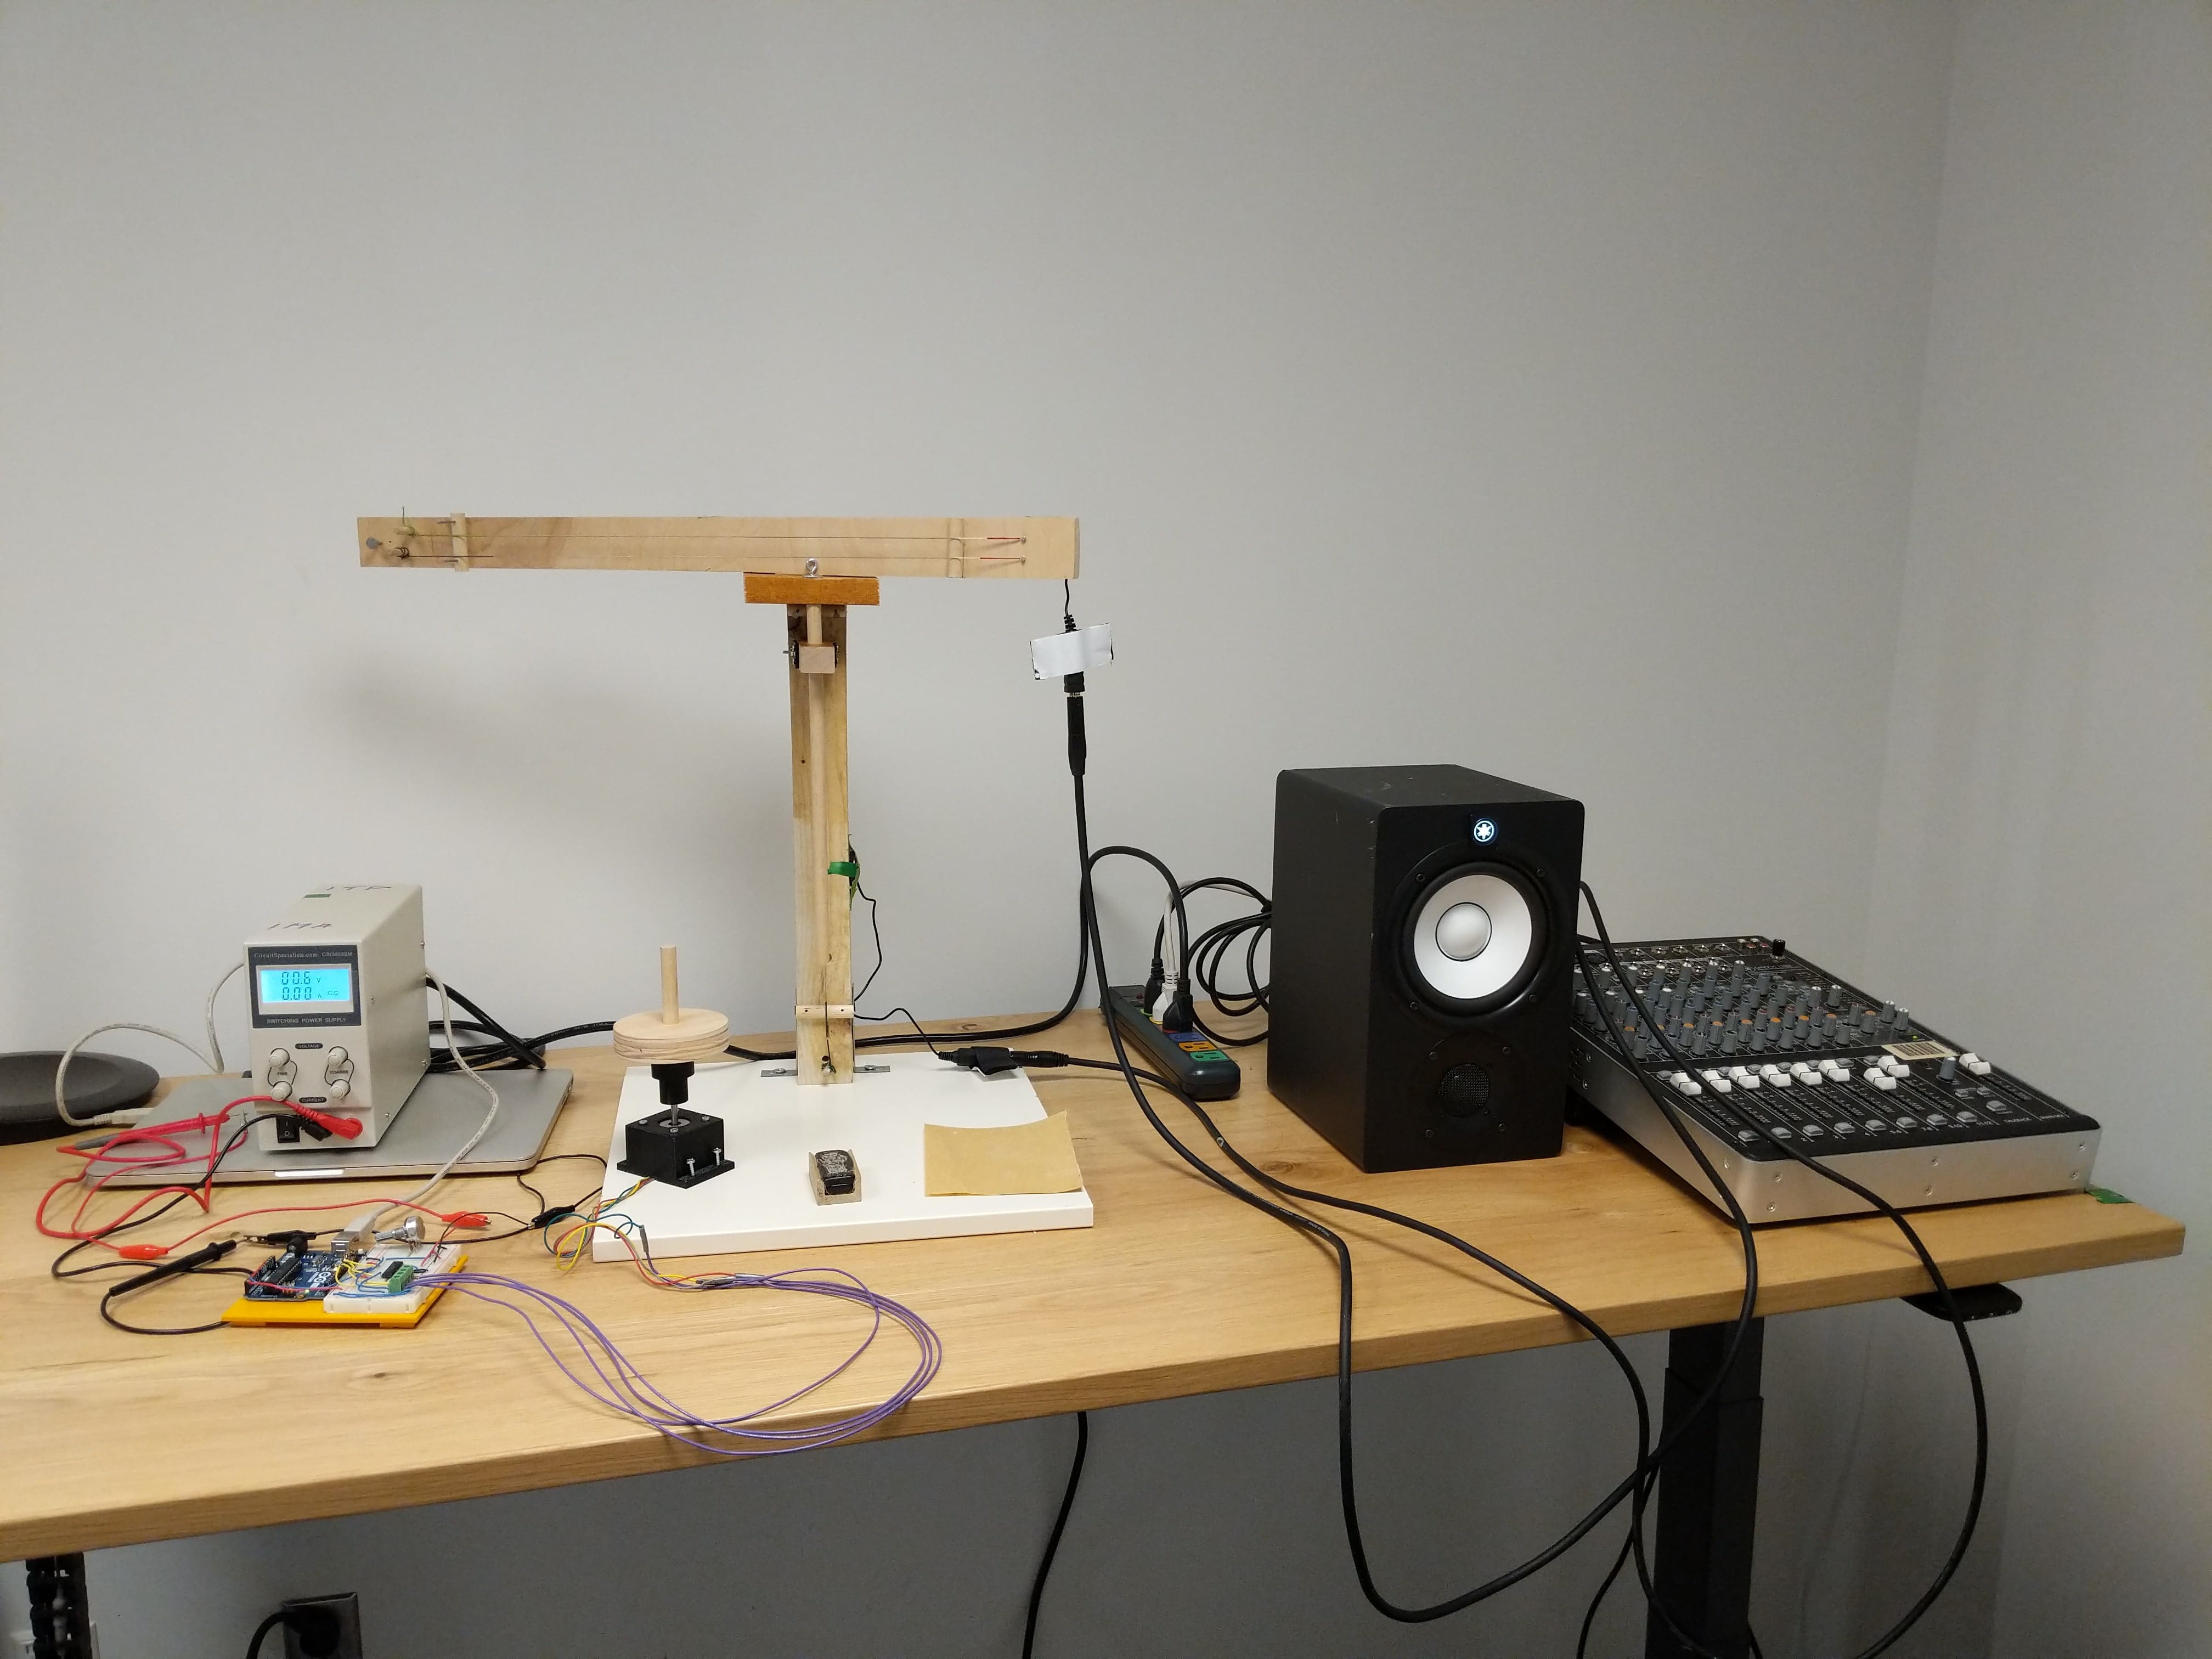
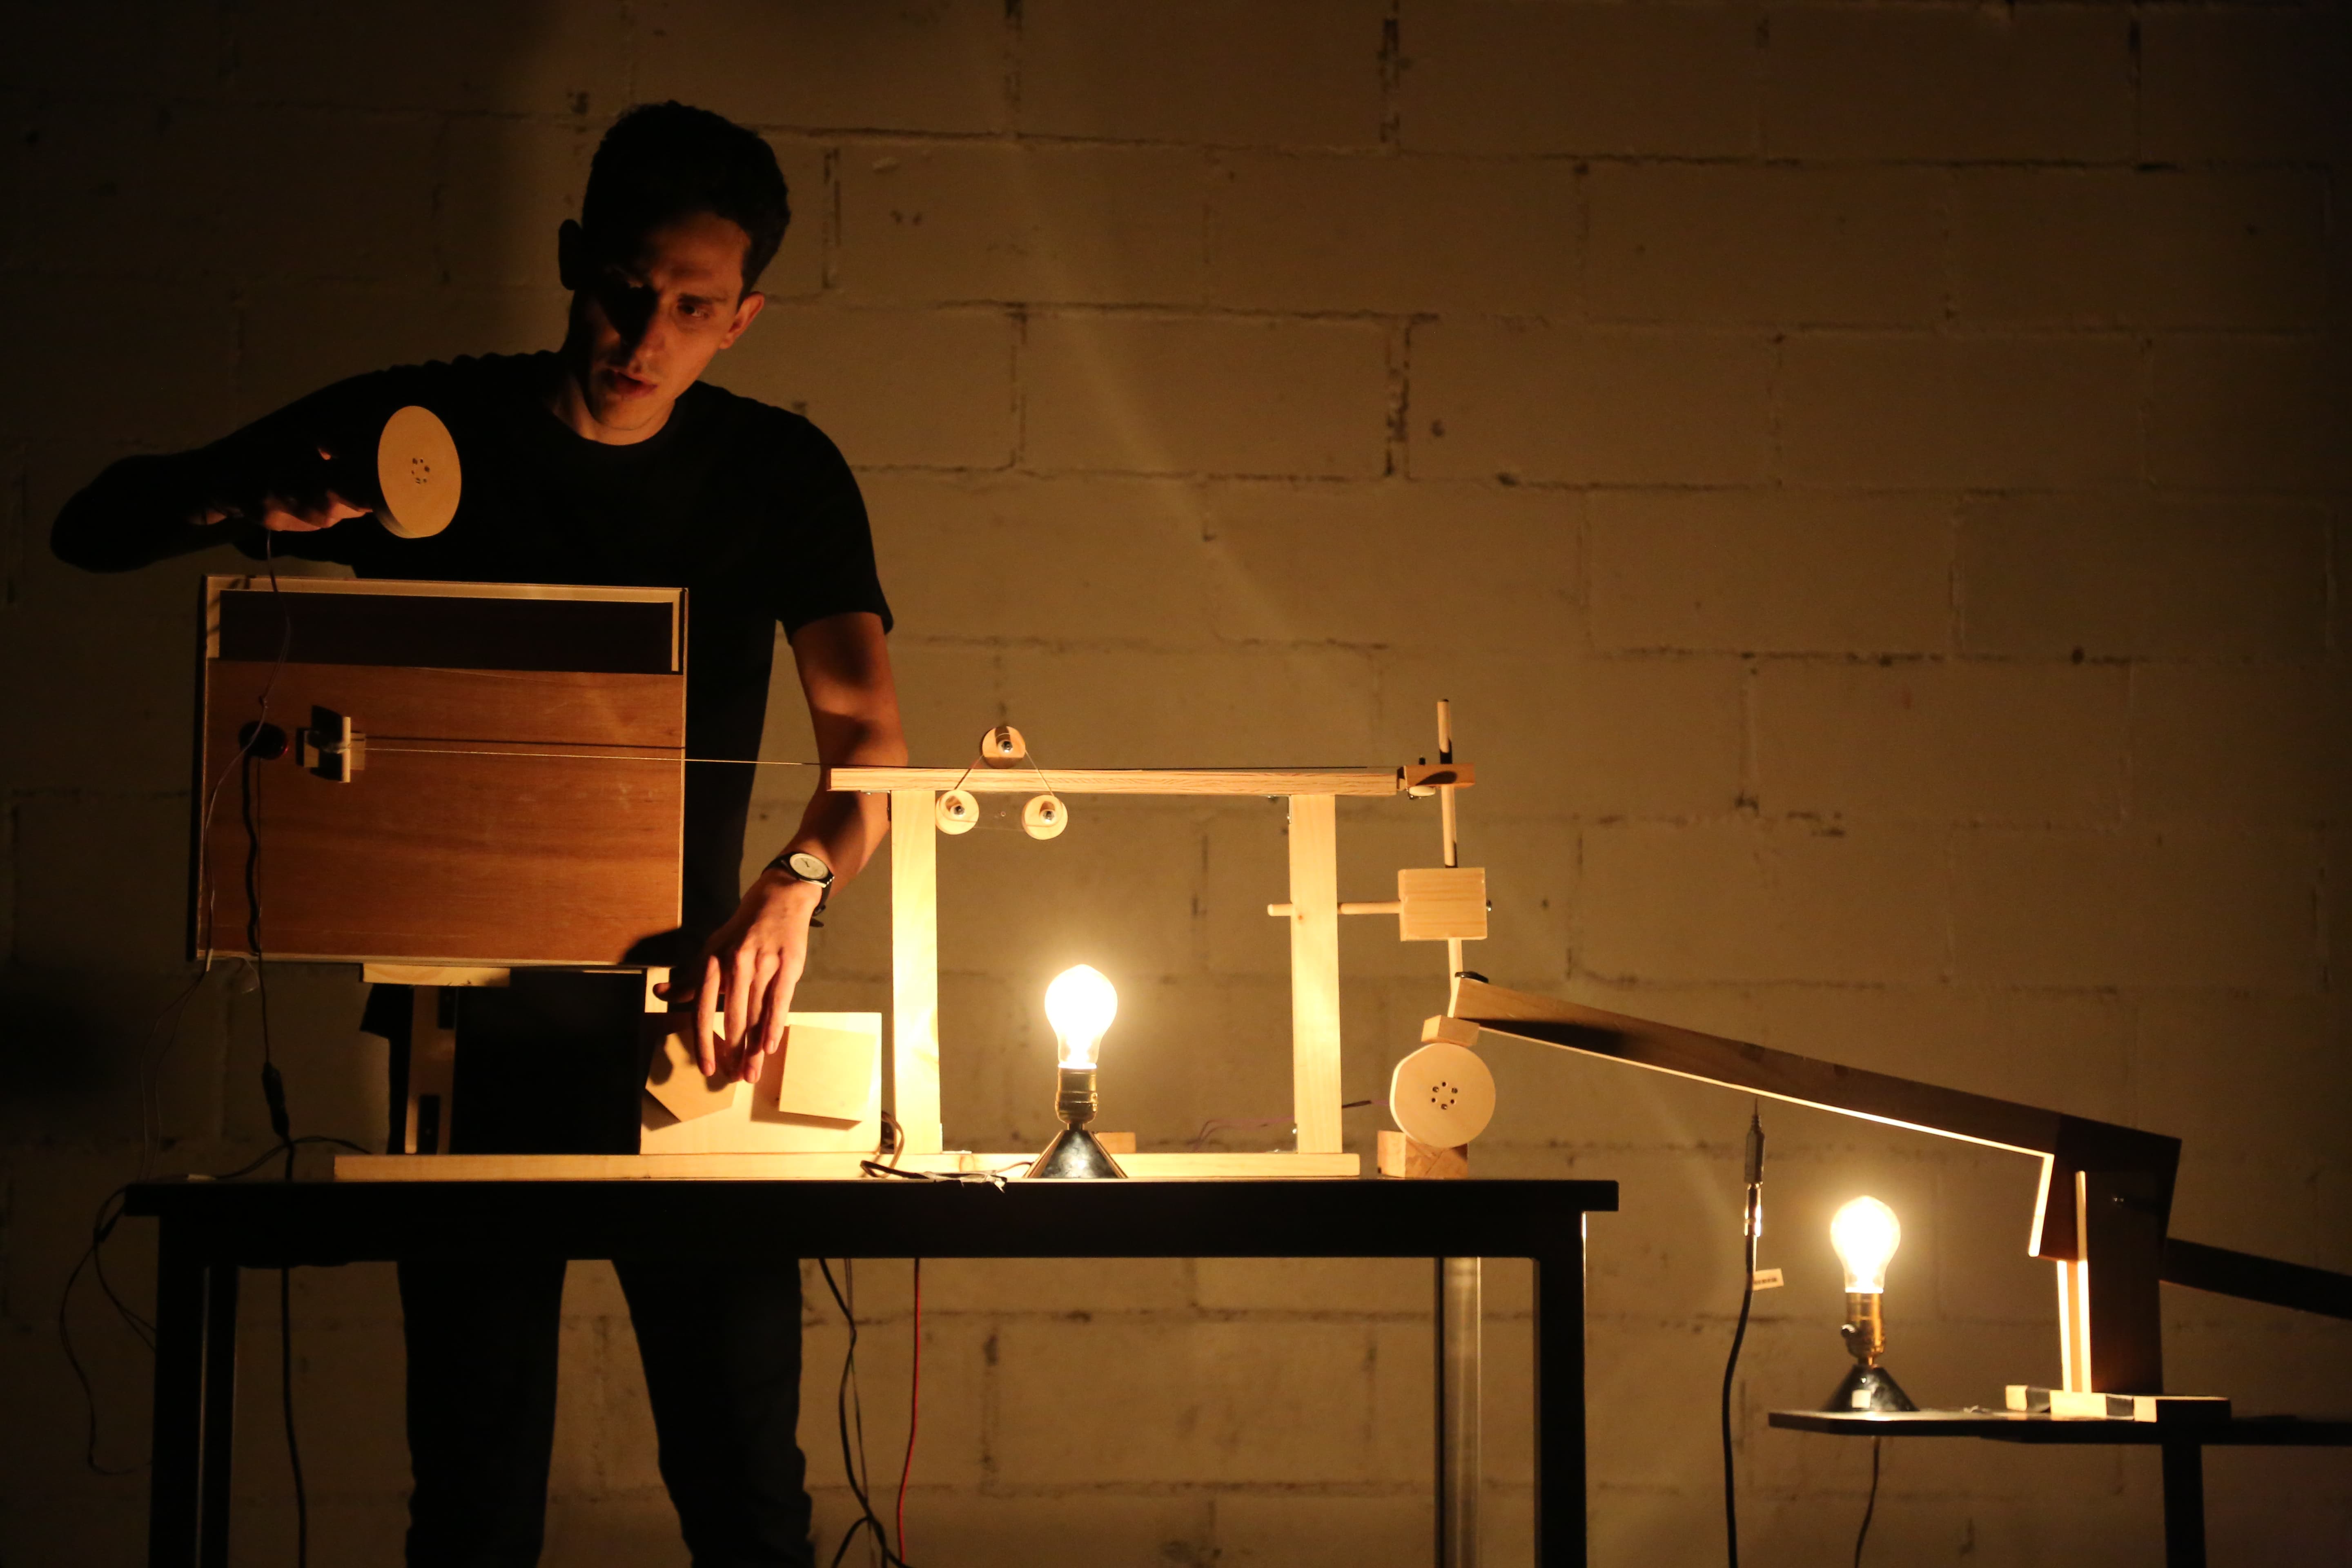
Putting everything together
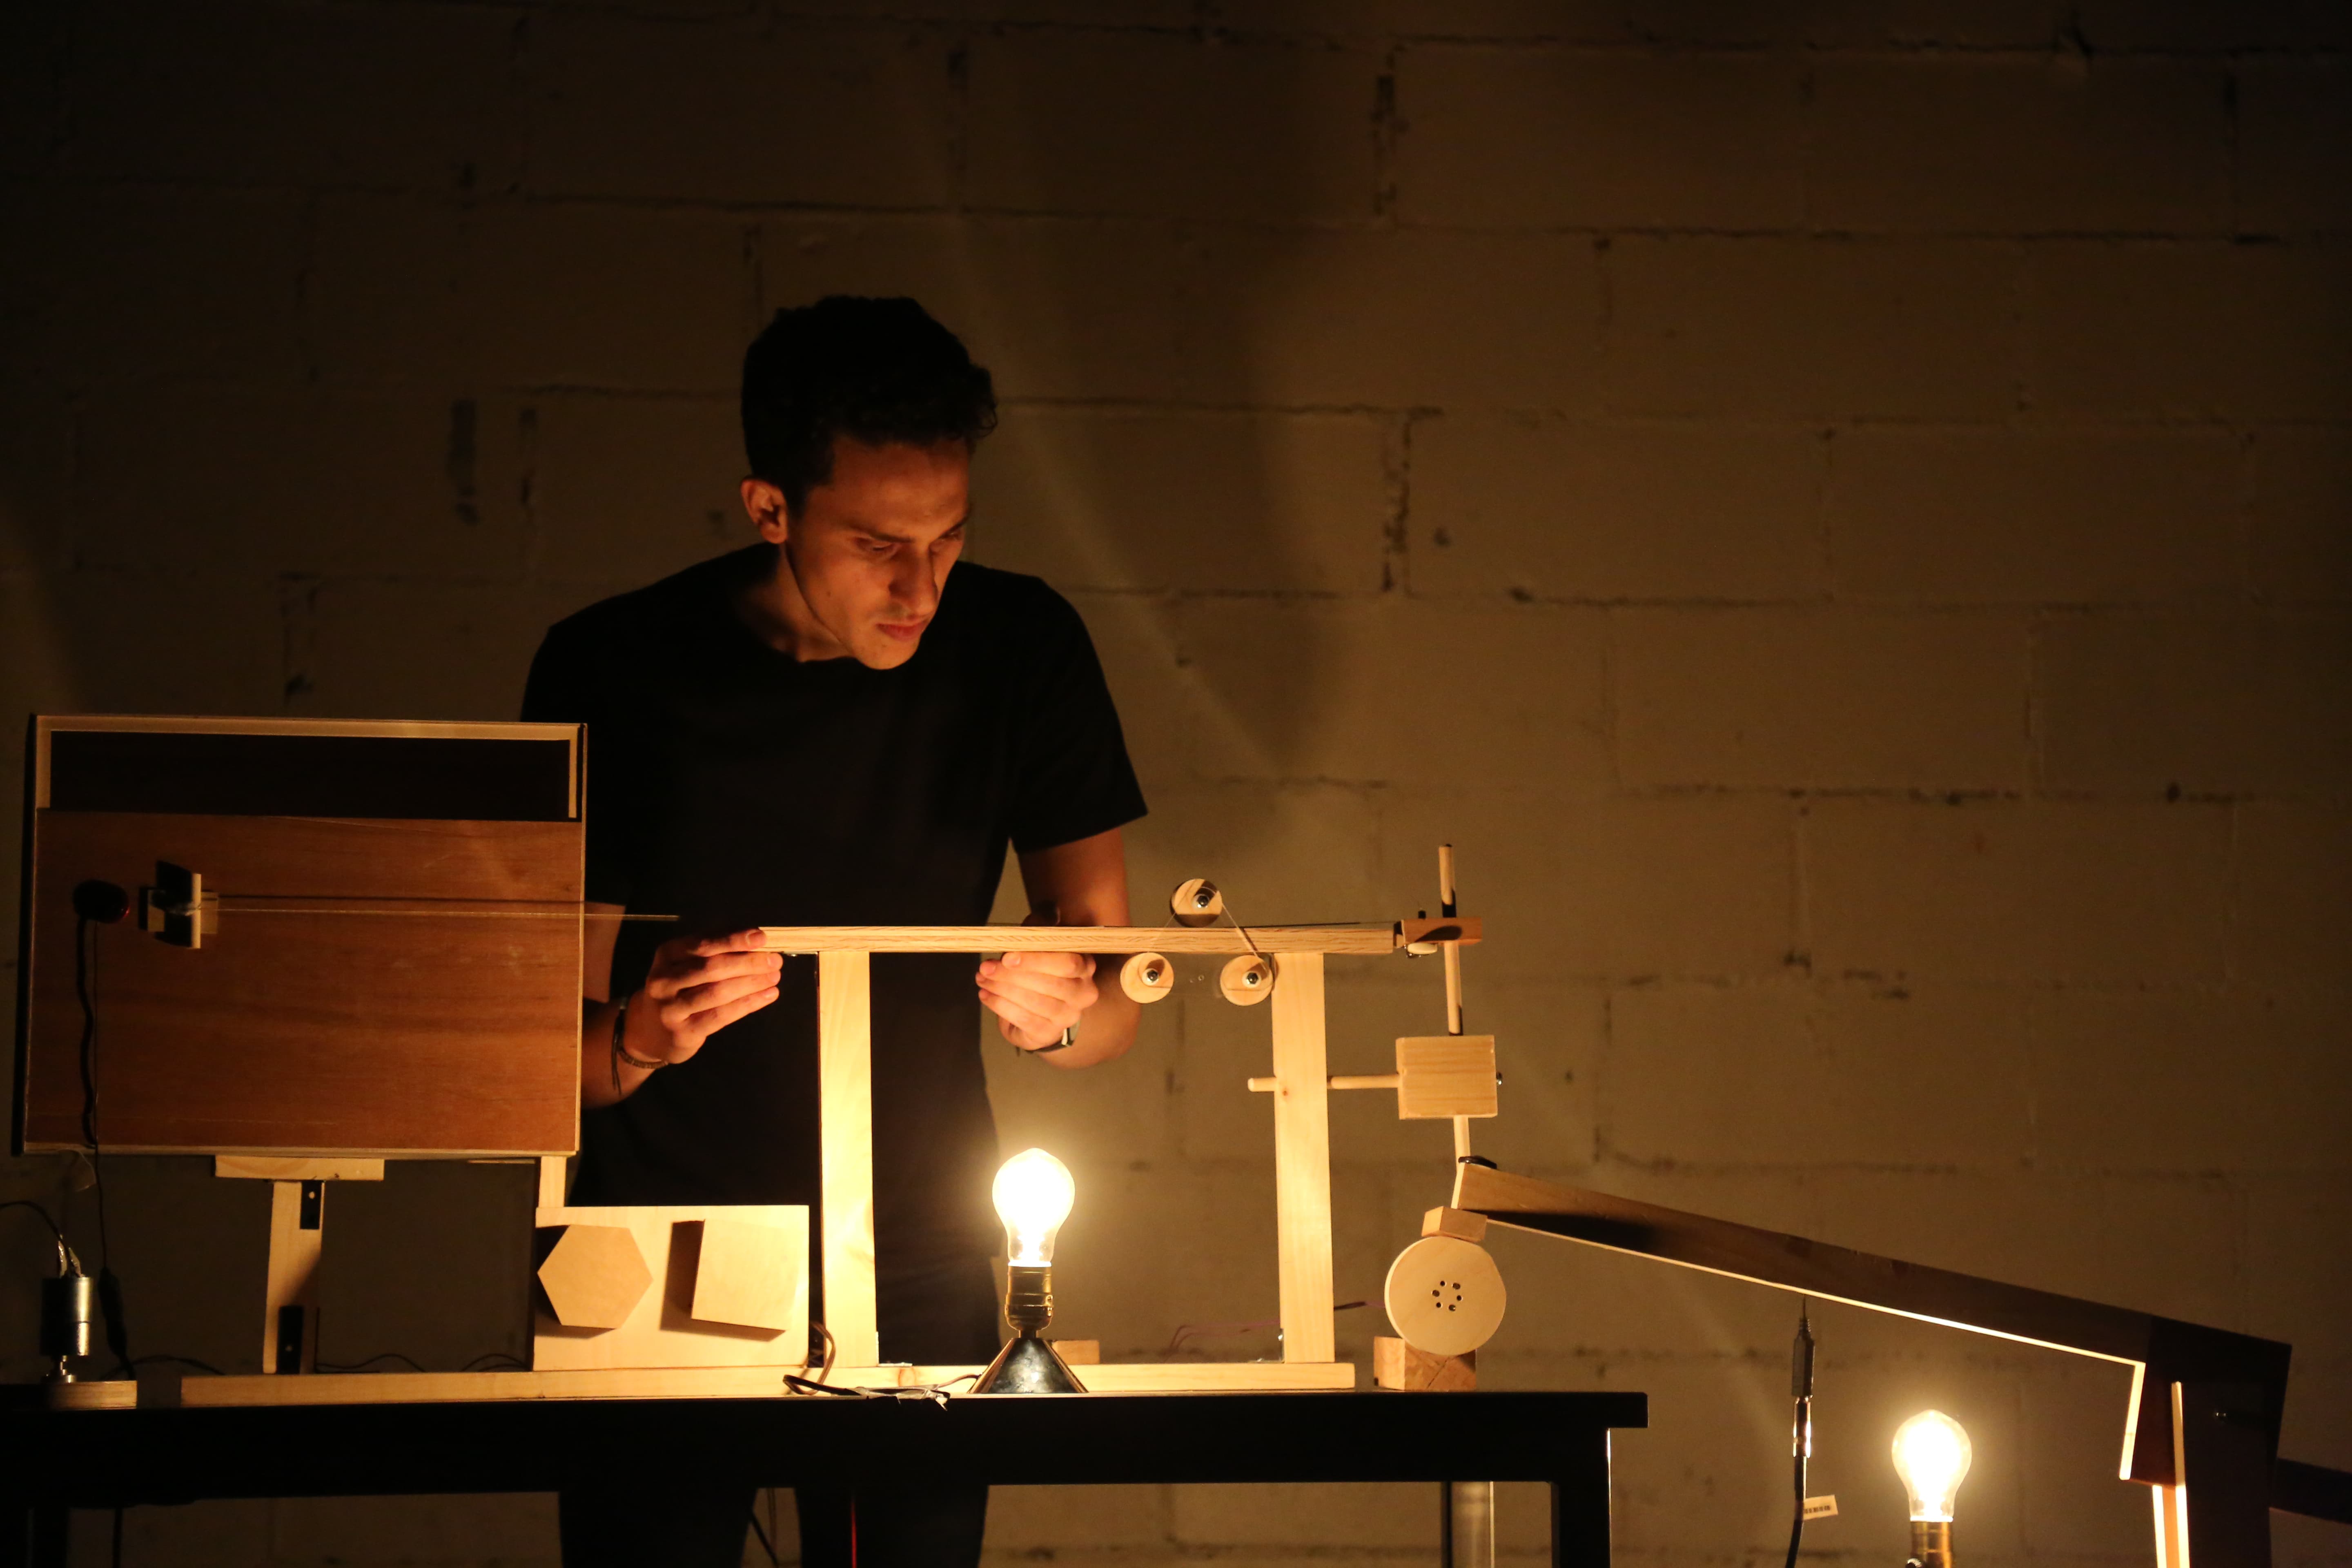
Once all the components finished drying, I started to see how they come together. By laying everything on a flat surface and looking at it from the top, I was able to gauge different distances between the components, accomplishing a harmonious composition between them.
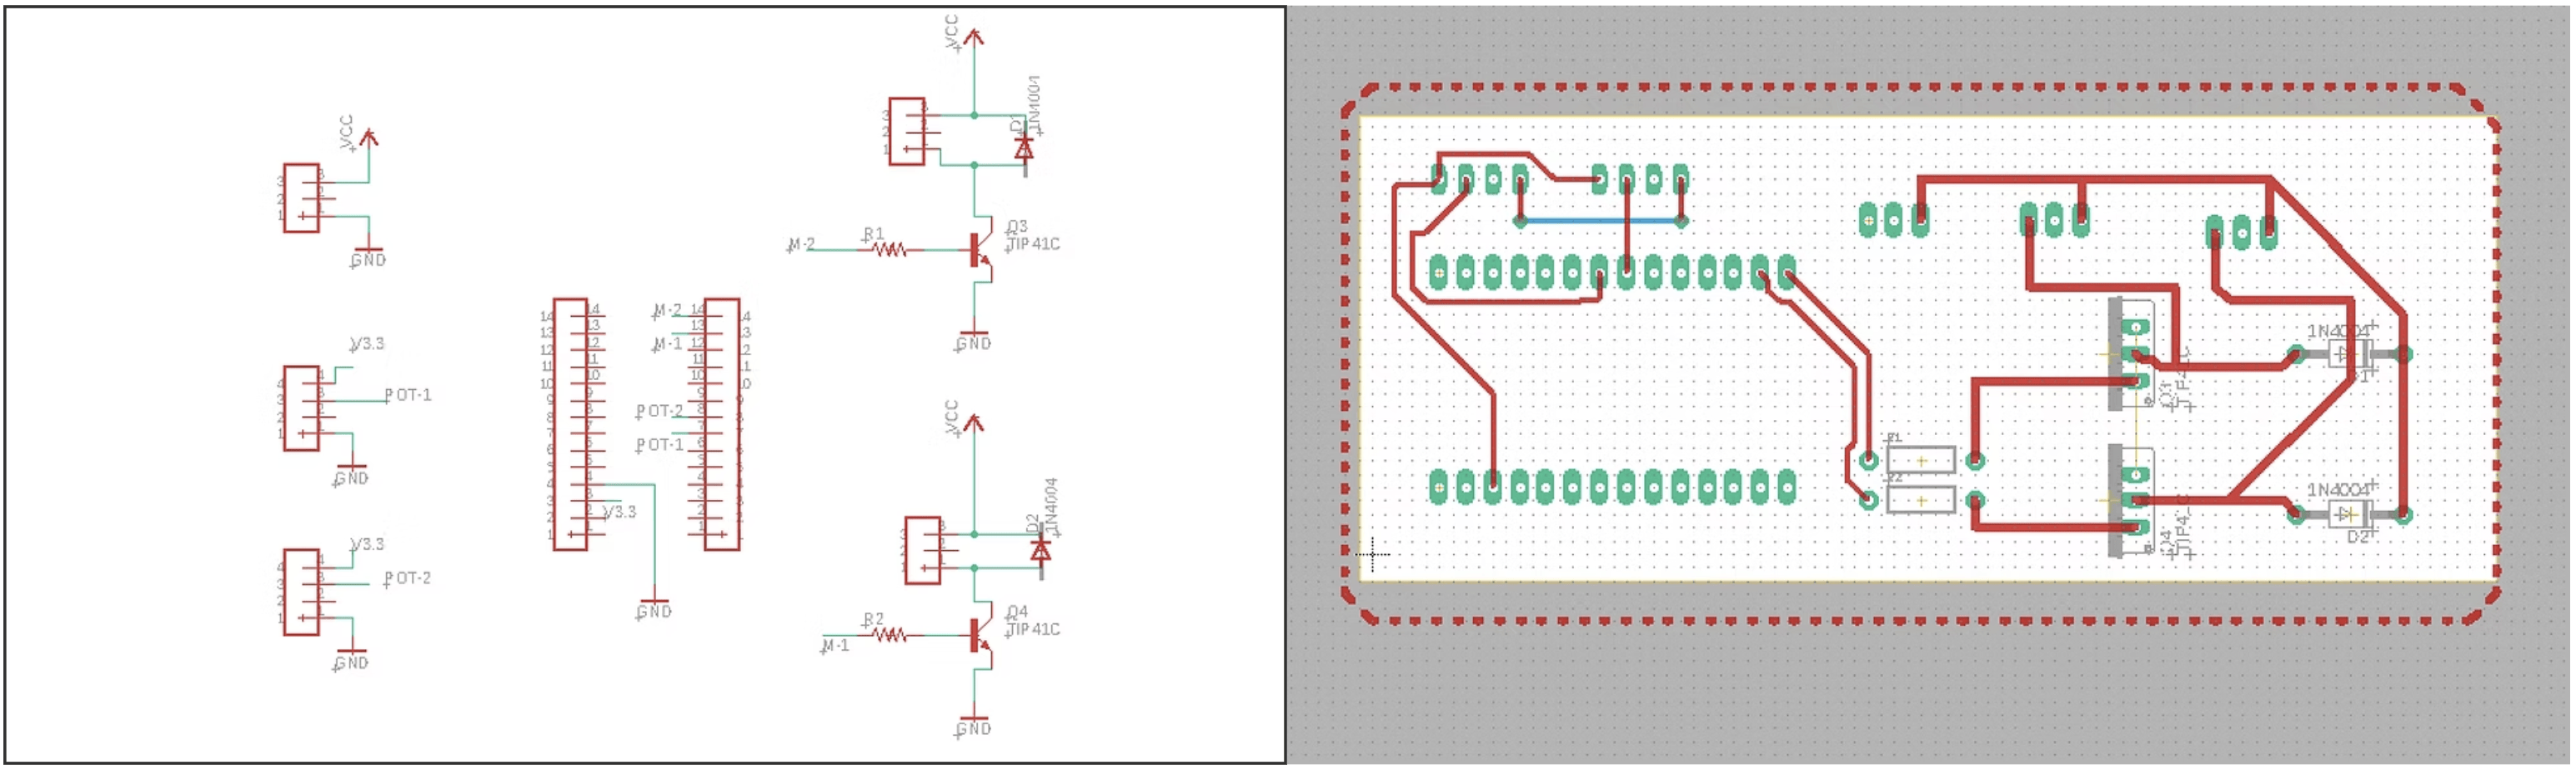
Instrument controller
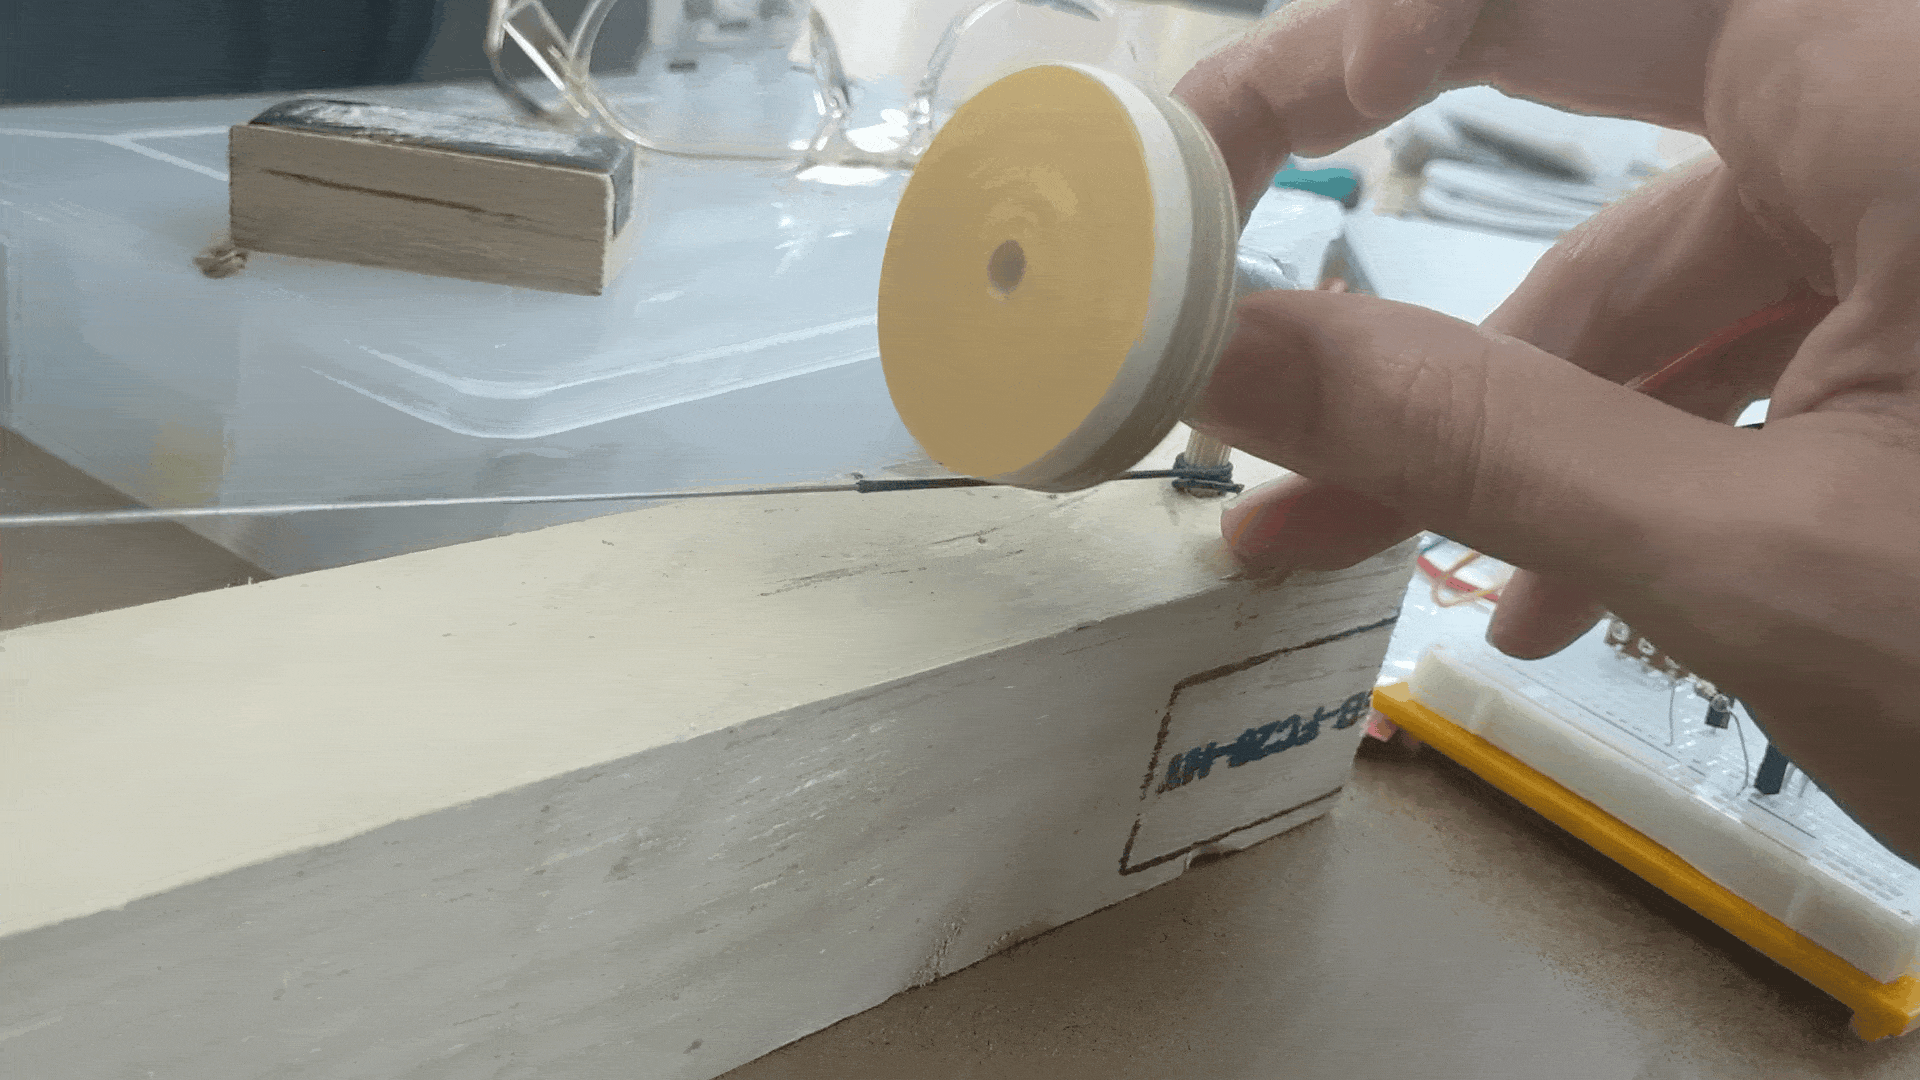
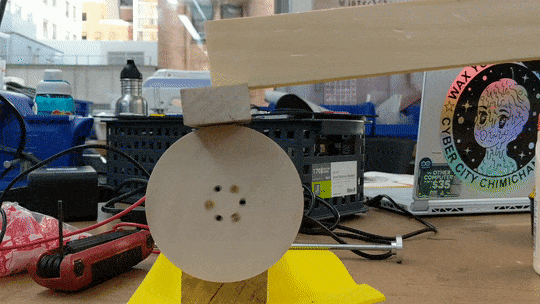
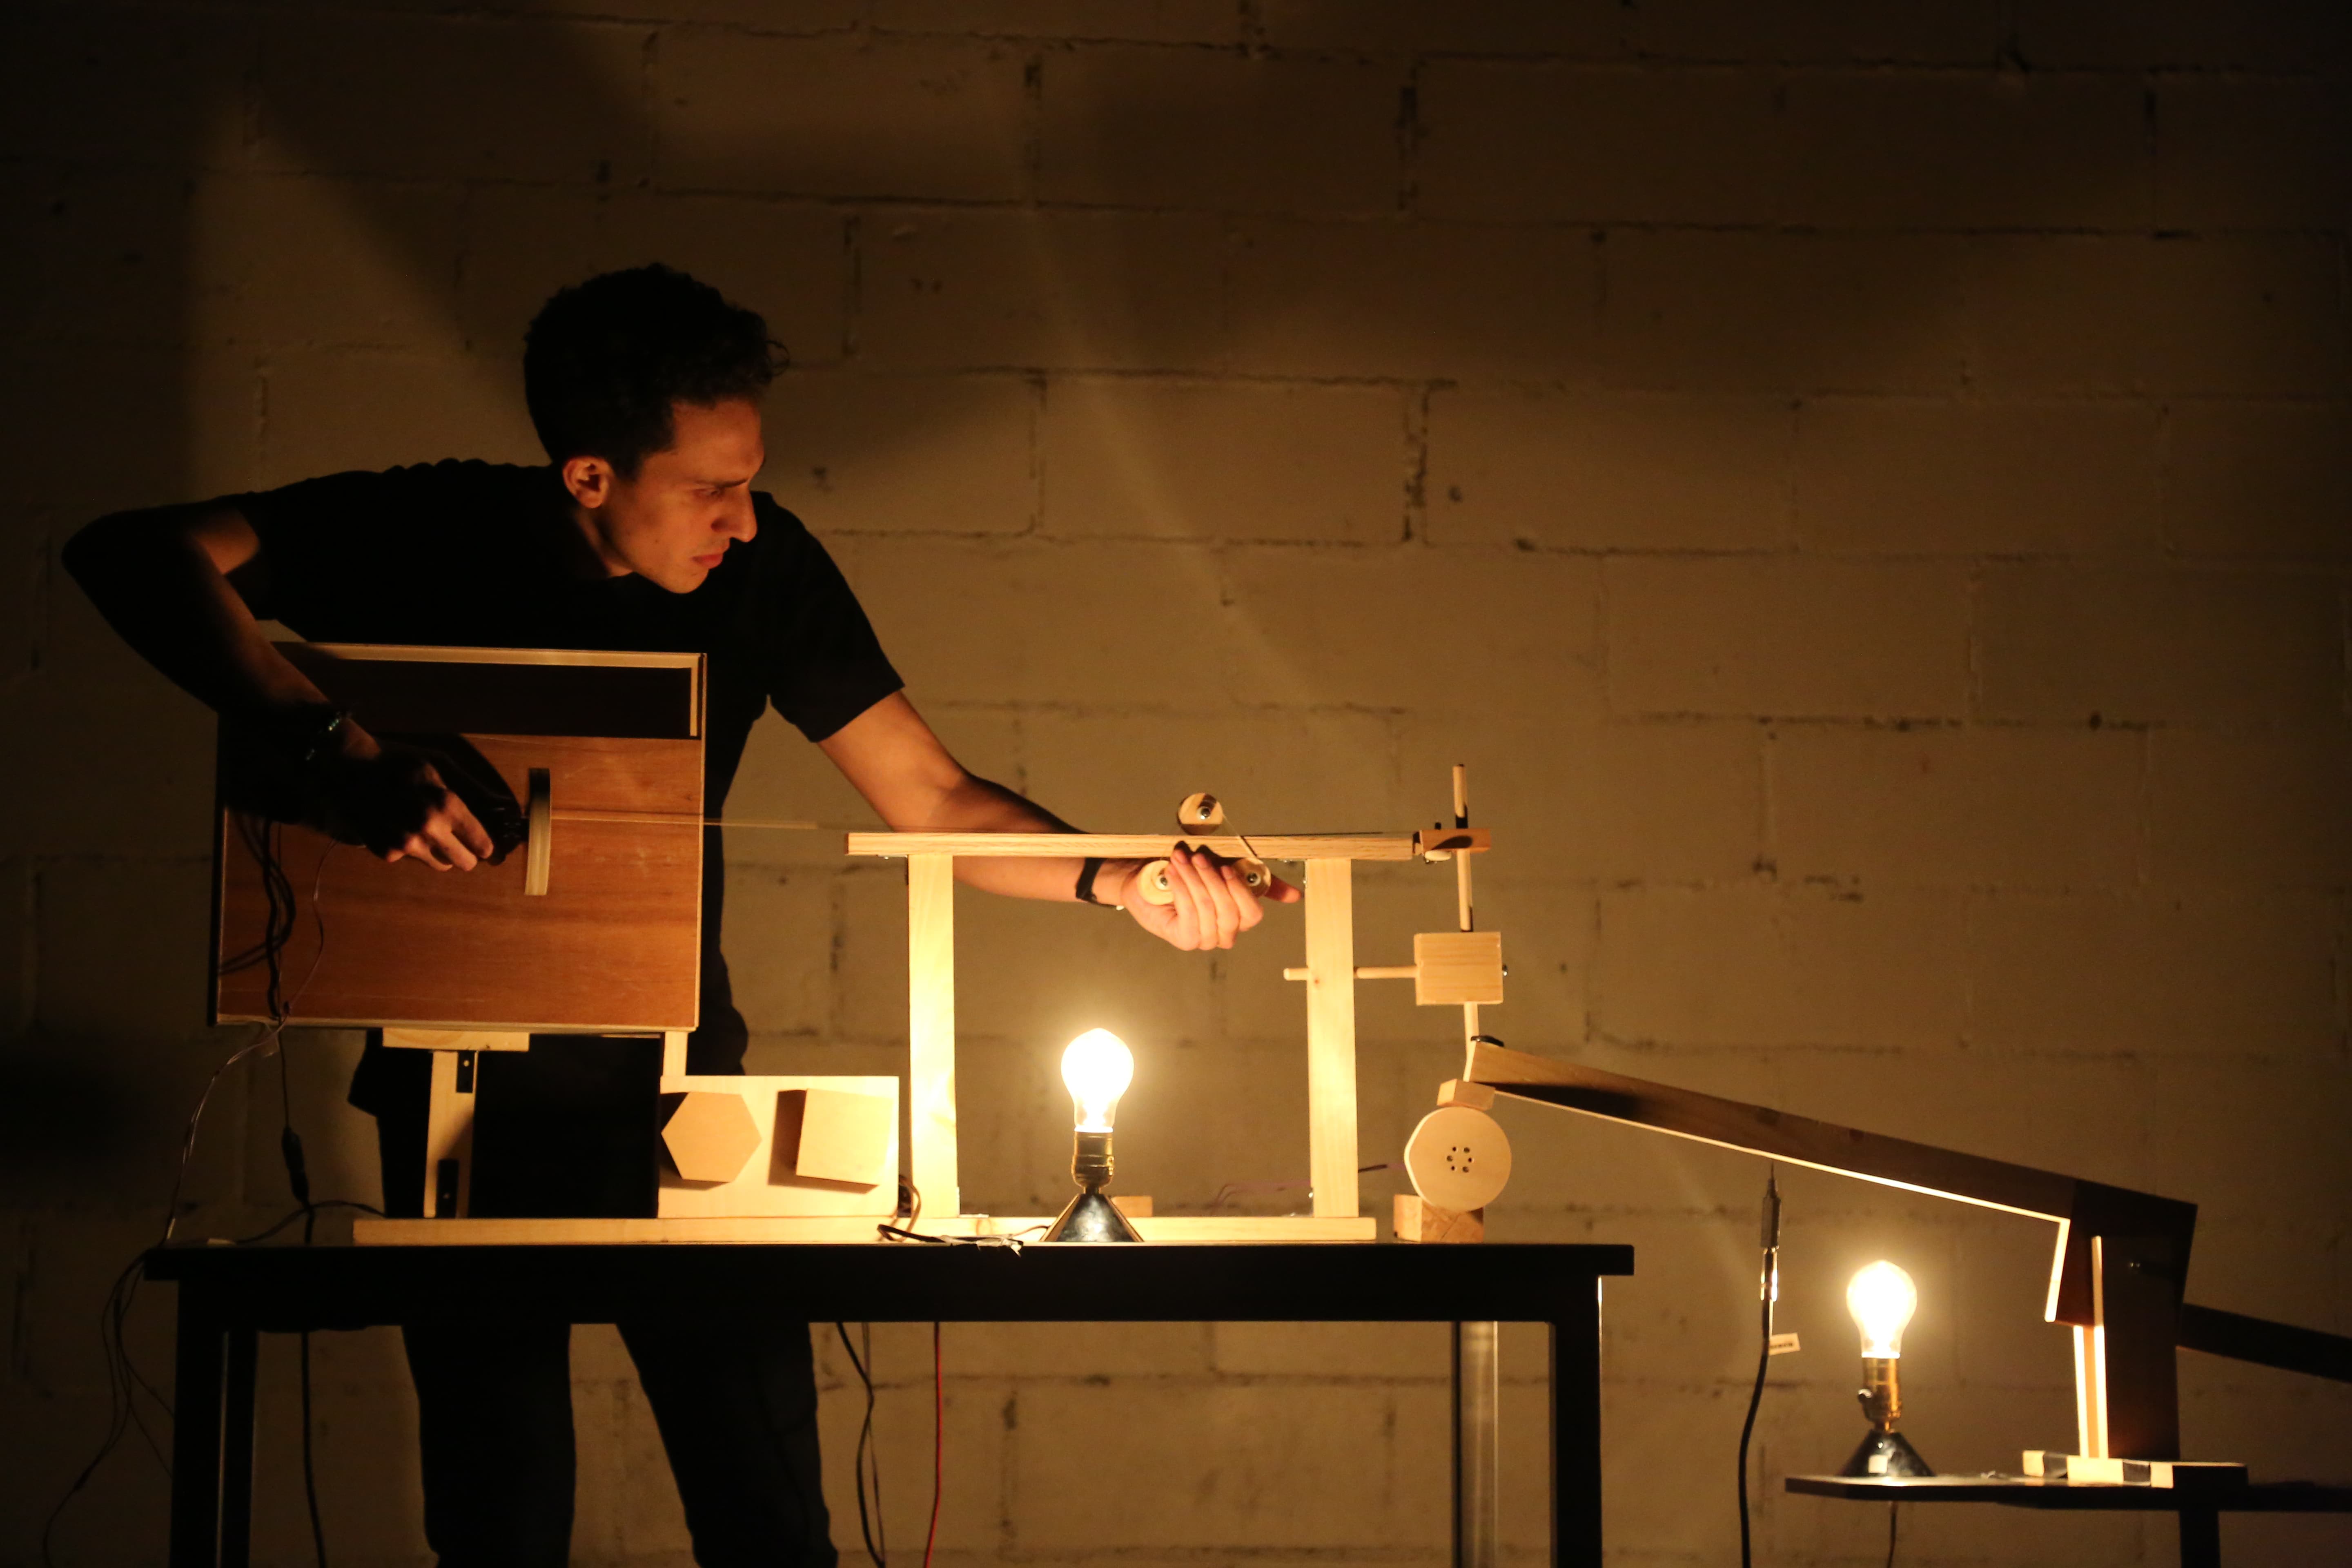
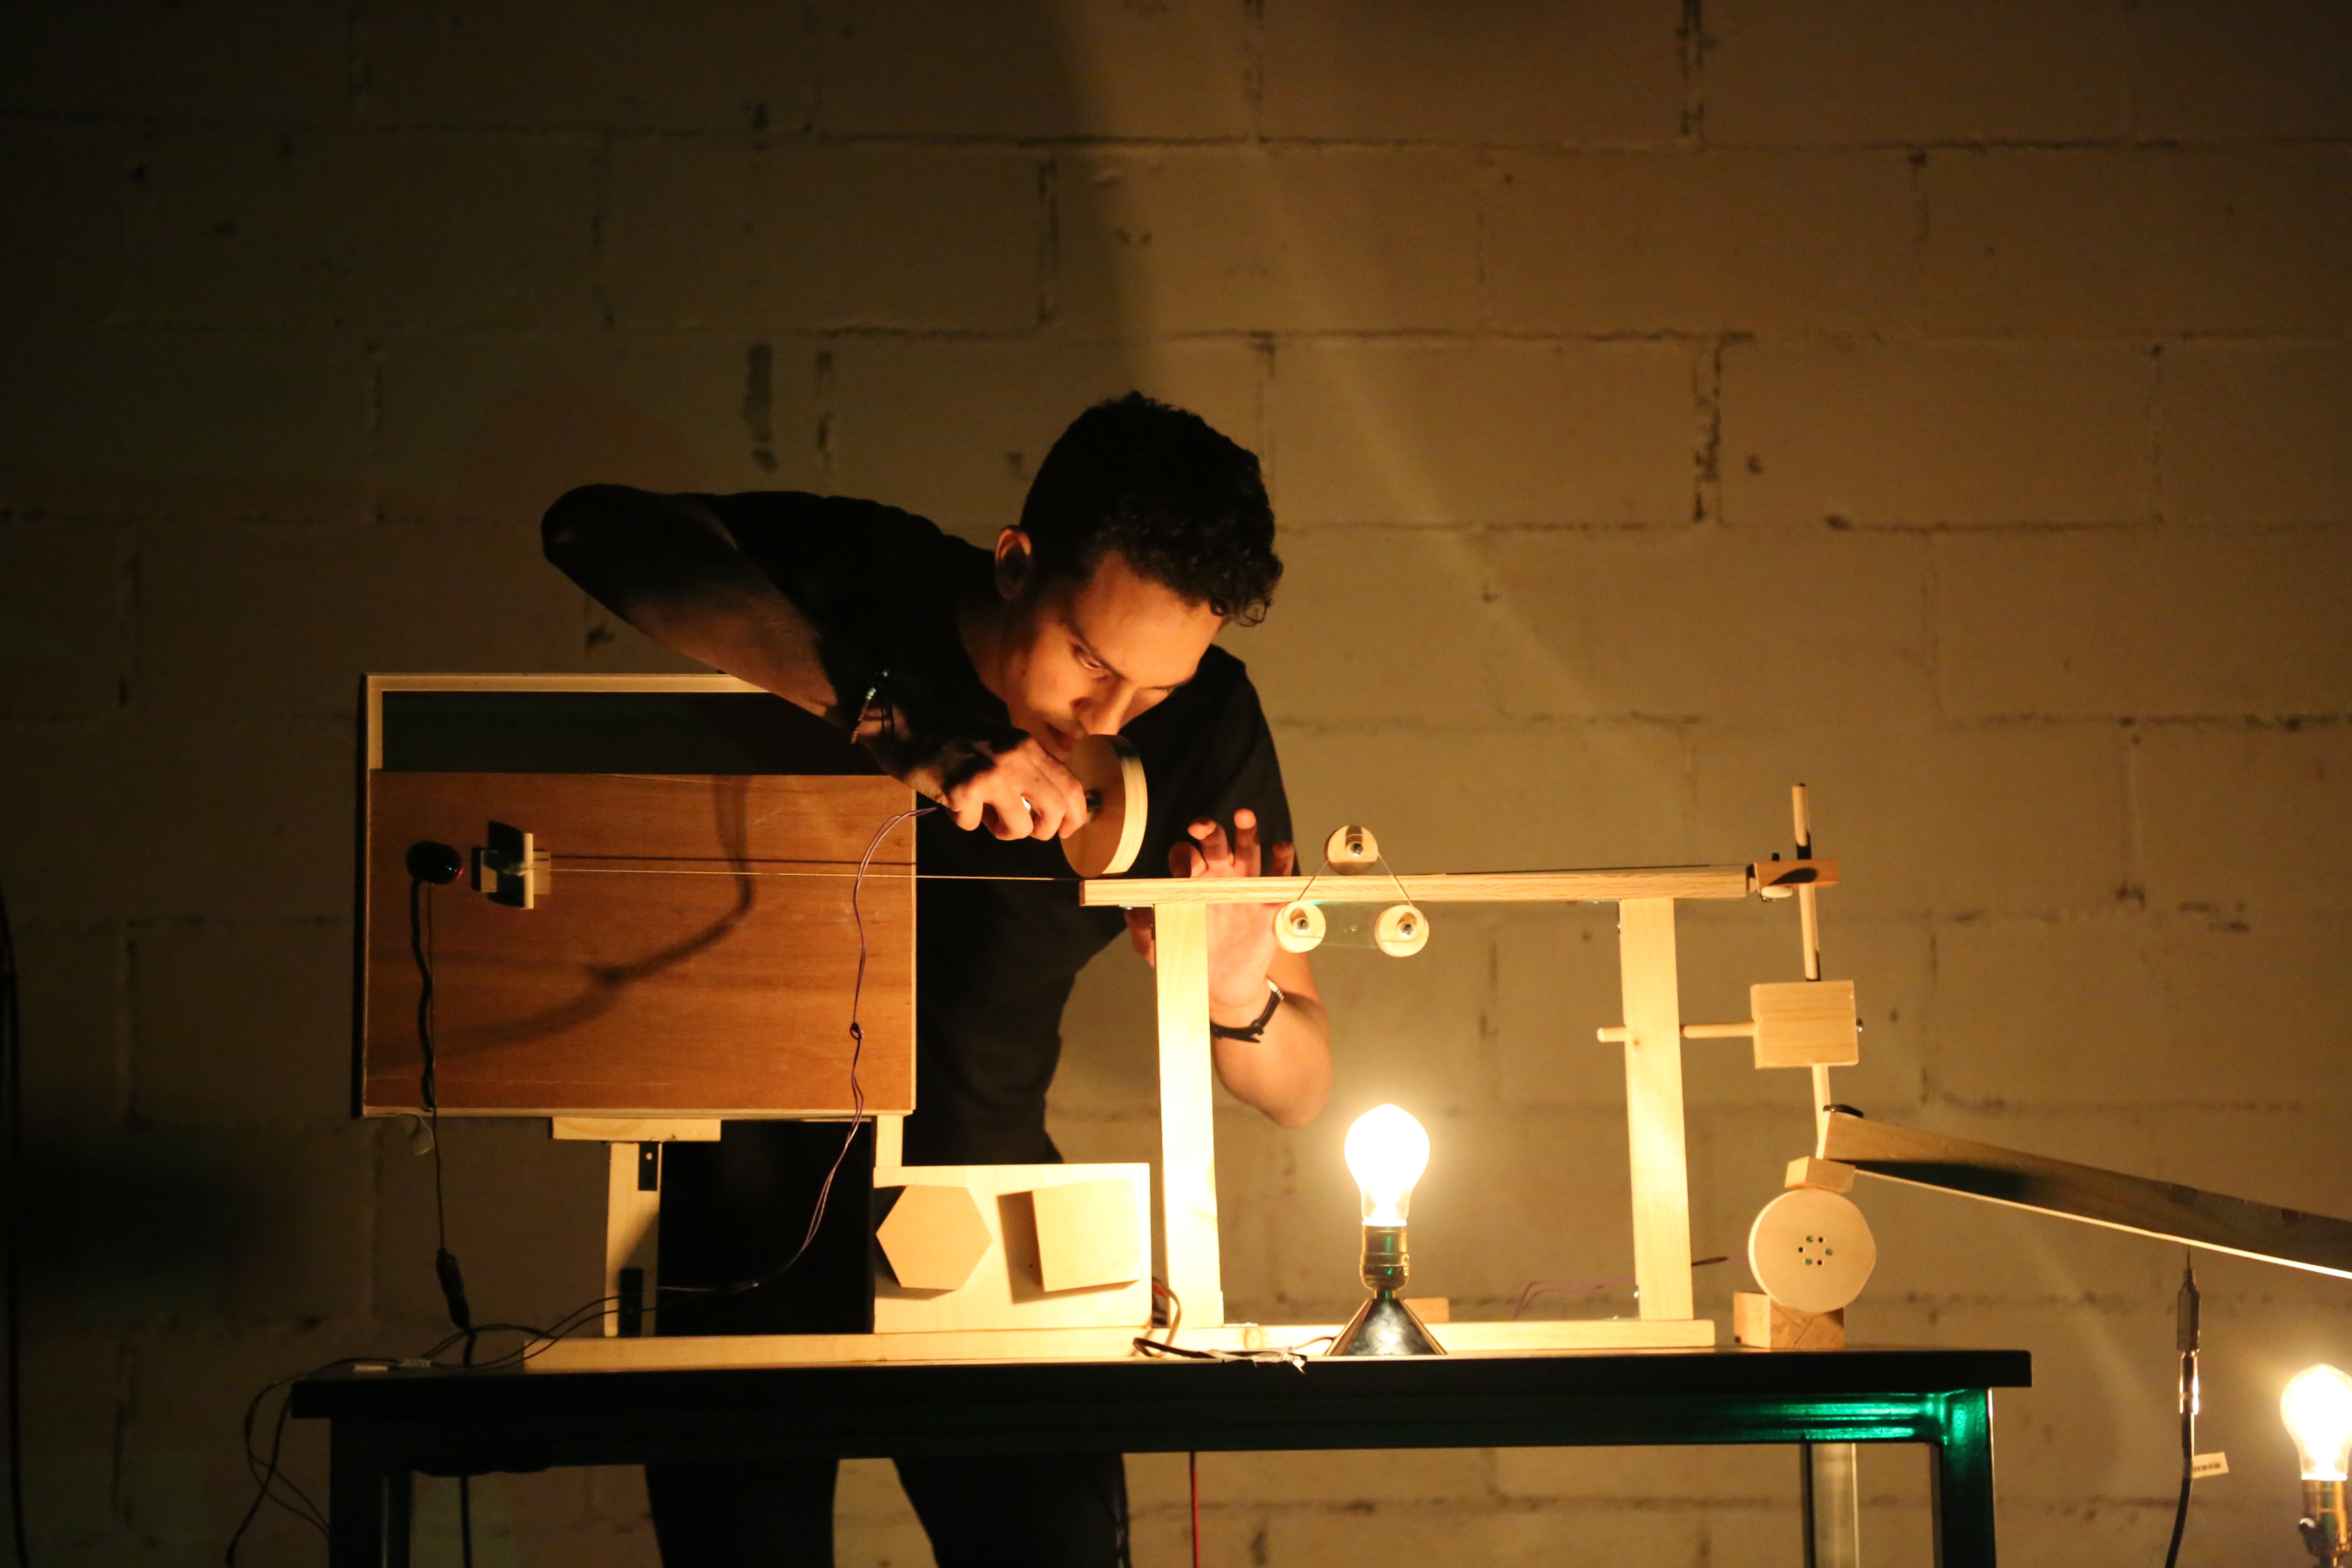
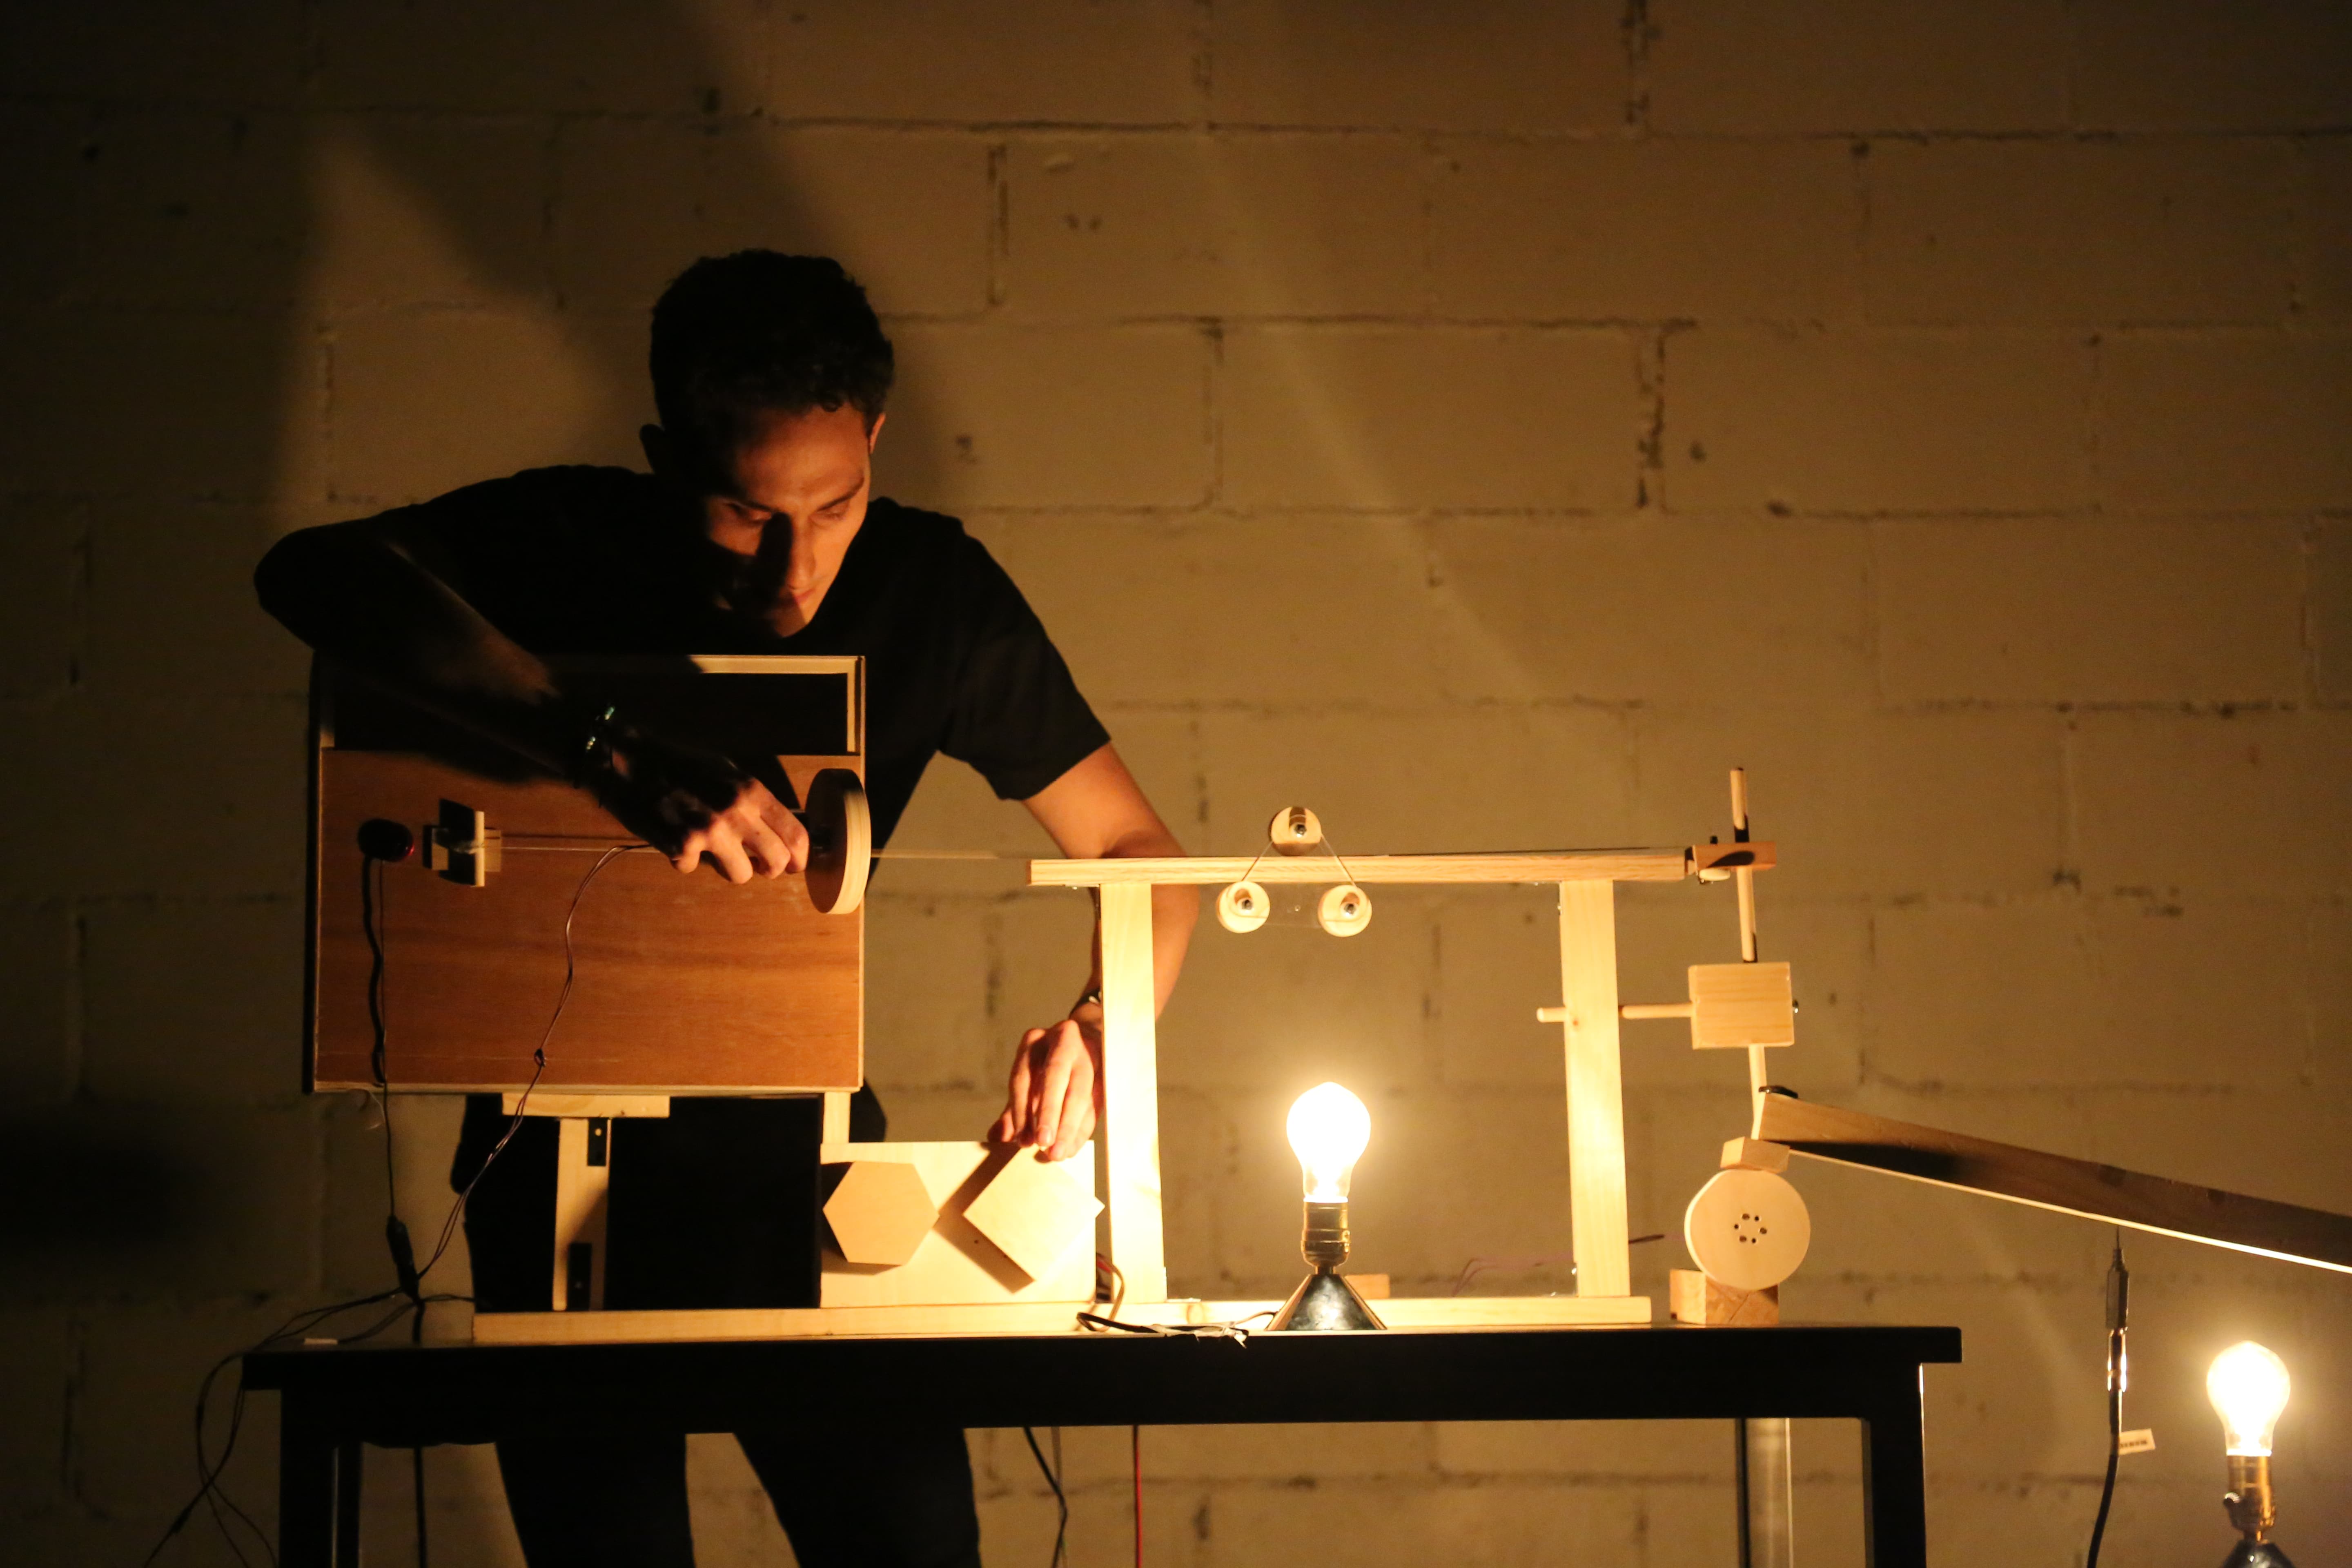
The instrument has two DC motors that produce different sounds. The tone motor brushes a wooden wheel against a guitar string and the percussive motor hits a wooden plate with a wooden wheel.
The relationship between the motor's speed and the sounds is very direct but also very nuanced. For example, sudden changes in speed on the percussive motor make the structure jump a bit higher, and this might make you skip a beat. For the tone wheel, the pressure with which the performer pushes the wheel against the string, as well as the distance from the bridge also changes the sound.
Since this instrument was meant to be performed live, I needed a clear way of showing the audience how and when the performer changes the speed of the motors. At first, I thought about having a force sensor around the motors – the harder the performer squeezed their hands the faster the motor would go. However, something like that would not be very effective at communicating with the audience.
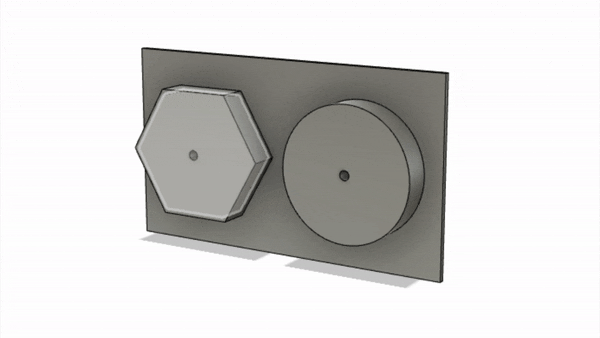
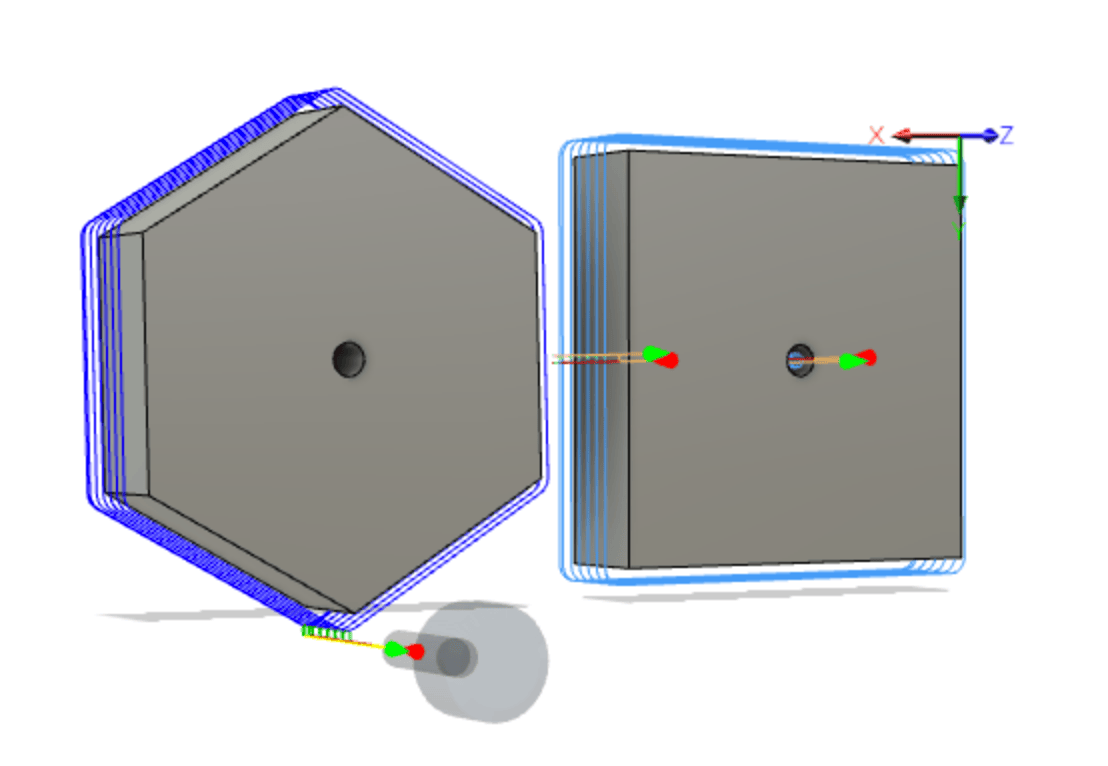
I iterated a few ideas and decided to go for two big knobs that face the audience. I experimented on Fusion360 with different polygons and found a relationship between two of them that felt harmonious, yet different enough from each other.
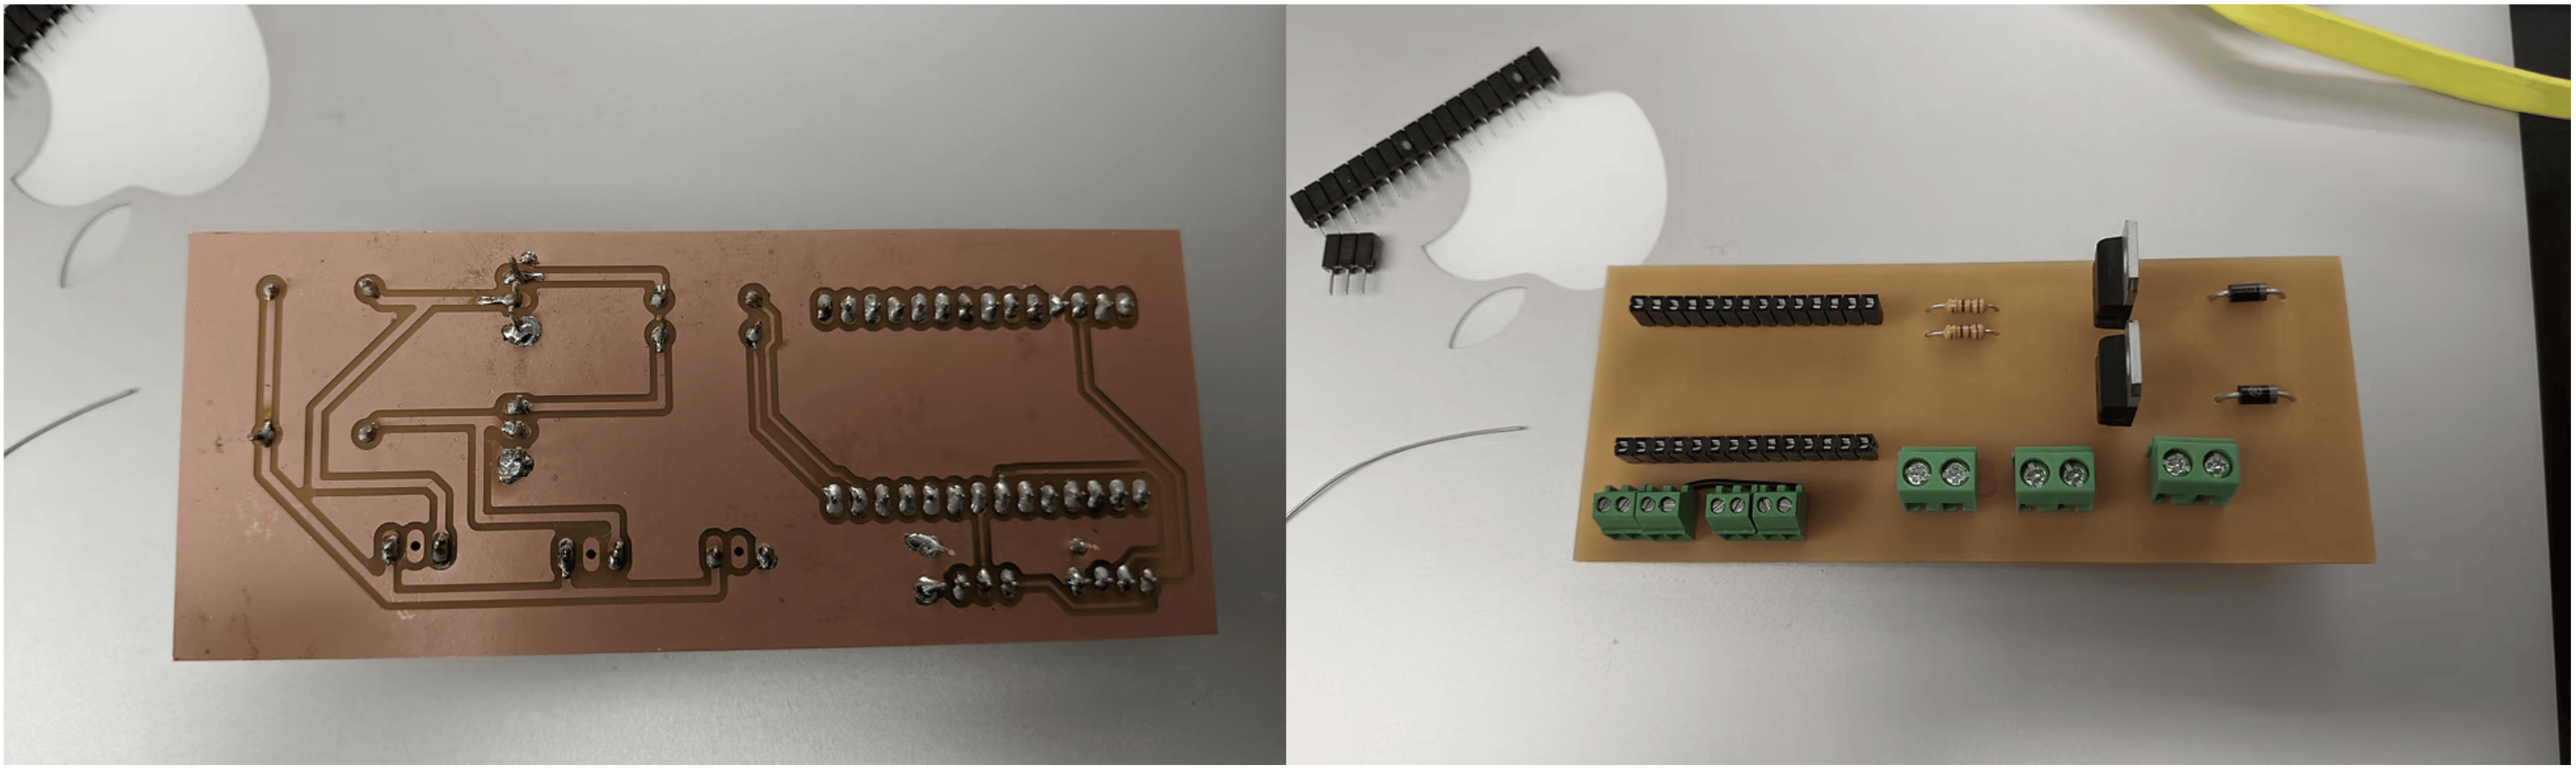
The motor controller was designed with an Arduino MKR 1010 because of its size. There are two potentiometers, each one attached to a knob, and two PWM outputs connected to high-speed switching NPN BJT transistors on a saturation configuration. The board was prototyped on a breadboard, then drawn on EagleCAD and milled using the Bantam Tools desktop milling machine (OtherMill).
Sound adjustments and practice
The instrument was finished, or at least that's how it seemed to be.
Once I had everything put together, I started discovering the instrument by playing it in total isolation as well as in front of others. I also asked some of my friends who are musicians to play with it and give me their feedback.
The first sounds that came out of the instrument were interesting but too screechy. I investigated this issue, and learned that the wooden wheel needed to be treated. I spent a few hours playing with different sandpapers, trying to shave off any imperfections in the wheel. It was very important that the wheel didn't become completely flat, because that would've removed every parasitic overtone at the fundamental frequency, and ironically, these overtones were what I was chasing to produce.
Final words
The process of understanding the sound that I was trying to put out into the world, and the interface with which I wanted to do so makes this project one of my favorites so far. I was lucky enough to be able to combine all the disciplines I love: music, design, hardware and mechanical design.
I had never performed in front of an audience like this one before. It was a very open and strong experience, and I had a great time doing it.
The ~4 months that I invested into this instrument were delightful. I felt very relaxed while working on it, and due to the intensive manual work that this required, I felt a big connection with myself and with music. Thank to the support of my peers and a lot of hard work I was able to create my very own acoustic instrument. This is something that will make me happy for a long time.
Thank you for reading.
Tools
- Low E Guitar String
- DC Motors
- Arduino
- Fusion 360
- EagleCAD
- CNC Router
- Birch & Maple Wood
- Drill Press
- Belt Sander
- Chop Saw
'/%3e%3c/svg%3e)

'%3e%3cpath%20d='m1770%205113c-505-14-749-59-1008-185-286-140-533-421-641-731-109-313-126-567-118-1787%207-1042%2020-1199%20118-1479%20114-324%20341-587%20635-737%20246-125%20445-166%20903-185%20310-14%201779-6%201986%2010%20314%2025%20503%2071%20713%20173%20296%20145%20543%20434%20650%20760%20101%20307%20117%20561%20109%201763-7%201037-20%201194-118%201474-114%20324-341%20587-635%20737-241%20122-447%20166-872%20184-196%208-1448%2011-1722%203zm1697-463c334-14%20491-42%20649-114%20185-86%20339-240%20419-421%2059-135%2087-267%20107-515%2018-219%2018-1953%200-2134-32-335-103-522-261-688-180-190-376-267-761-298-202-17-1599-25-1930-11-377%2015-523%2040-688%20116-182%2085-337%20241-417%20420-59%20135-87%20268-107%20515-18%20218-18%201953%200%202134%2032%20334%20102%20519%20260%20687%20213%20227%20458%20299%201062%20312%20331%208%201466%205%201667-3z'/%3e%3cpath%20d='m3880%204229c-99-15-185-77-230-166-35-67-36-196-2-264%2094-192%20352-233%20495-80%20198%20212%2022%20552-263%20510z'/%3e%3cpath%20d='m2340%203855c-282-52-529-183-721-382-169-174-275-368-337-610-25-99-27-124-27-303s2-204%2027-303c153-602%20666-1007%201278-1007%20299%200%20563%2089%20800%20271%20236%20180%20402%20434%20476%20731%2032%20127%2043%20359%2025%20489-78%20535-464%20961-993%201095-87%2022-130%2027-278%2030-120%202-198-1-250-11zm470-480c272-86%20476-289%20566-565%2026-79%2028-97%2028-250s-2-171-28-250c-90-275-290-475-566-566-79-26-96-28-250-28-153%200-171%202-250%2028-275%2090-476%20290-566%20566-26%2079-28%2096-28%20250s2%20171%2028%20250c99%20303%20328%20512%20641%20586%2042%209%20102%2013%20200%2010%20118-3%20154-8%20225-31z'/%3e%3c/g%3e%3c/svg%3e)
